


17 CHECK AND ADJUSTMENT
17-9
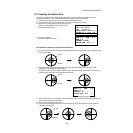
17.3.6Checking / Adjusting the Laser Plummet (For Laser Plummet type)
● Check
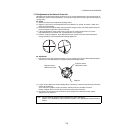
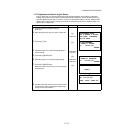
1) Turn on the laser plummet and coincide the center of the laser with a measuring point.
2) Rotate the instrument 180° or 200g around the vertical axis and check the measuring point.
If the laser is properly centered in the measuring point, adjustment is not required. Otherwise,
adjust in the following manner.
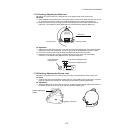
● Adjustment
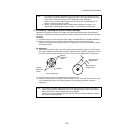
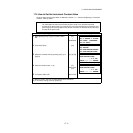
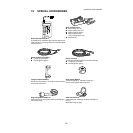
1) Turn the cap located on the left side corner of the
instrument counterclockwise and remove it.
This will expose four adjustment screws which
should be adjusted with the accessory hexagonal
wrench.
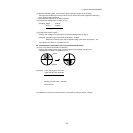
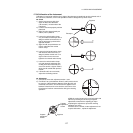
2) Shift the laser to the measuring point. However,
correct only one-half of the displacement in this
manner.
3) Use the leveling screws and coincide the center of the laser and the point.
4) Rotate the instrument 180° or 200g around the vertical axis once more and check the point and the
laser. If the laser is coincided to the measuring point, then further adjustment is not required.
Otherwise, repeat the adjustment.
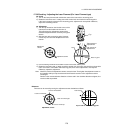
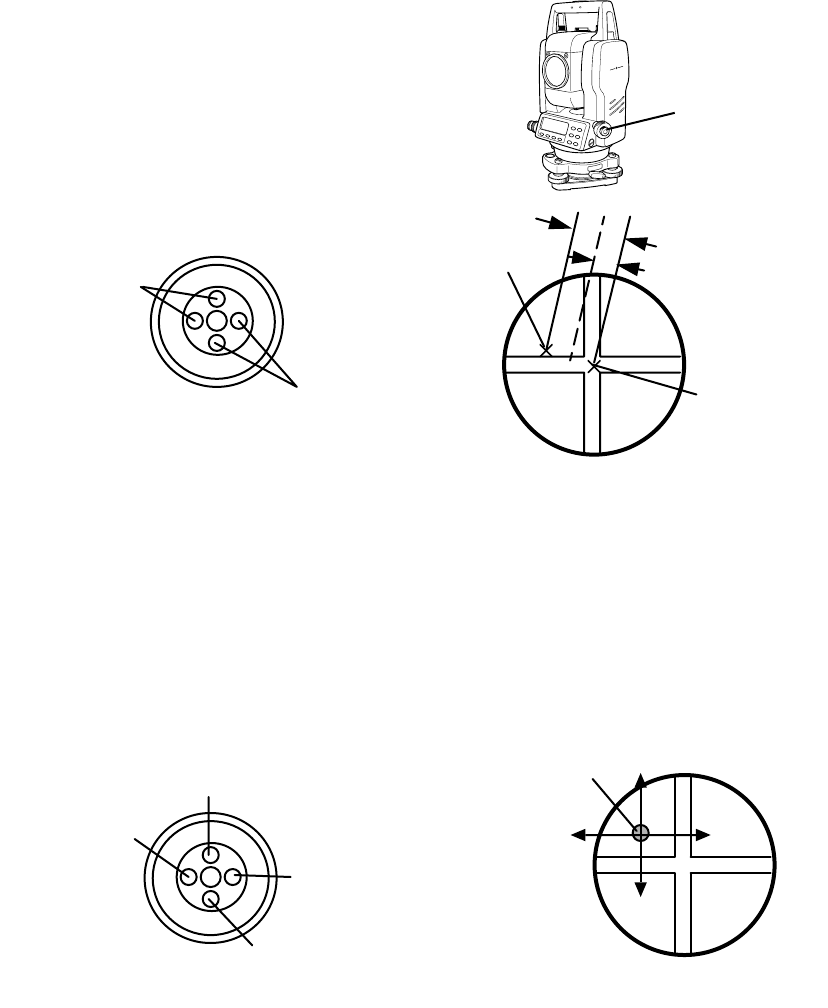
Reference
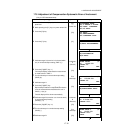
The laser can be moved by turning the adjustment screws clockwise as follows.
Cap
Adjustment screws
Adjustment
screws
Half amount of
displacement
Measuring point
Laser
Totla amount of
displacement
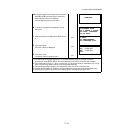
Note: Note:First, loosen the adjustment screw to move the laser. Then tighten the adjustment screw on
the opposite side by an equal amount which will leave the tension of the adjustment screws
unchanged.
Revolve in the counterclockwise direction to loosen and in the clockwise direction to tighten, but
revolve as little as possible.
Laser beam
Top of view of the measuring point
Laser is moved down.
Laser is moved right.
Laser is moved left.
Adjustment screws
Laser is moved up.