110
User-set Allocations Section 4-4
Step 4: Turn ON the Slave User Allocations Switch
Turn ON the Slave User allocations Switch (word n, bit 11). This will make the
DeviceNet Unit read allocation results data for the slaves above from the CPU
Unit and create a scan list based on data for slaves that are actually online
prior to starting remote I/O communications with the scan list enabled.
Note The Master User Allocations Switch not only reads slave allocation
data, but it also enables the scan list.
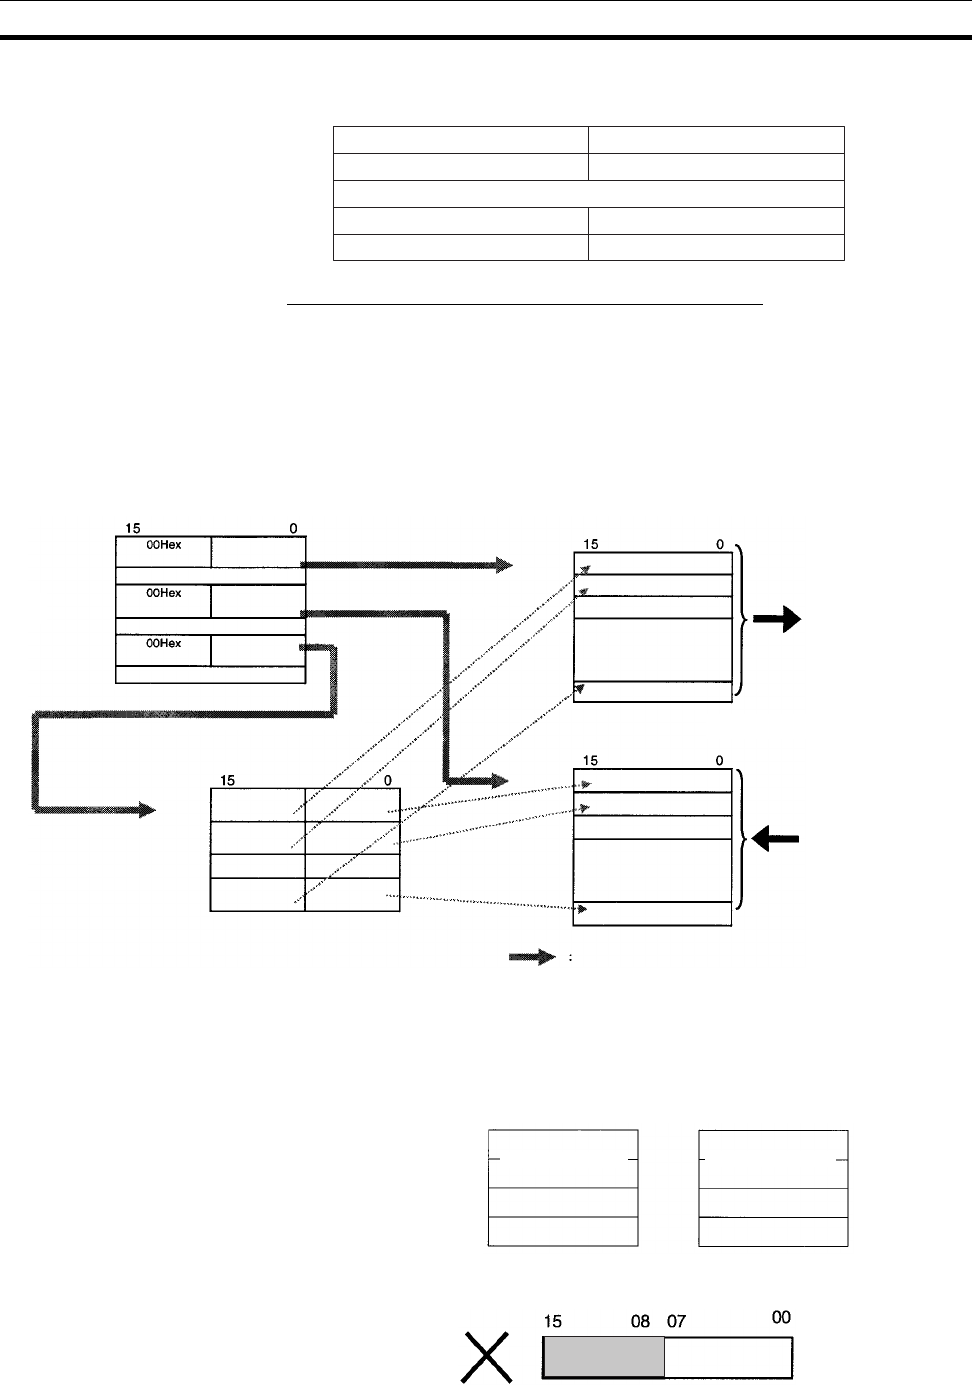
Note 1. Any order can be used for the OUT 1 and IN 1 blocks.
2. Node addresses do not have to correspond between output block 1 and in-
put block 1.
3. The start bit for node addresses must always be bit 00, and never bit 08.
l is the first word in the Allocation Size Setup Table and is specified at words m+5 and m+6
Bit
Node address 0 OUT size (bytes)
Node address 1 OUT size (bytes)
Node address 62 OUT size (bytes)
Node address 63 OUT size (bytes)
Node address 0 IN size (bytes)
Node address 1 IN size (bytes)
Node address 62 IN size (bytes)
Node address 63 IN size (bytes)
toto
15 08 07 00
I+0
I+1
I+62
I+63
Master User Allocations Table in
the allocated DM Area words
Bit
OUT block 1
area
First word of OUT block 1
IN block 1
area
First word of IN block 1
Size Setup Table
Area
First word of Size Setup Table
Specify the first word.
Specify the
first word.
Specify the
size.
OUT block
Bit
Node address 0
Node address 1
Output to Slaves
Node address 63
IN block
Bit
First word
specified
Node address 0
Node address 1
Node address 63
Input from Slaves
Specify the first word.
in allocated DM Area words
Set first word.
Bit
Address 0
OUT size
Address 0
IN size
Address 1
IN size
Address 1
OUT size
Address 63
OUT size
Address 63
IN size
First word
specified
m+1 wd
m+2 wd
m+3 wd
m+4 wd
m+5 wd
m+6 wd
I wd
I+1 wd
I+63 wd
to
Allocation Size Setup Table
Example:
OUT block 1 IN block 1
Node address 01
Node address 02
Node address 03
Node address 01
Node address 02
This is not necessary.


