


GPS Chart Plotters Page 69
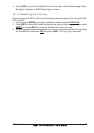
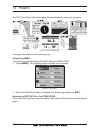
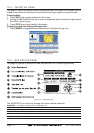
1. To change, press [MENU]. Move the ShuttlePoint knob to highlight SETUP MENU and
press [ENT].
2. Move the ShuttlePoint knob to highlight
GENERAL SETUP and press [ENT] or move
the ShuttlePoint knob to the right.
3. Move the ShuttlePoint knob to highlight
WINDOW SETUP and press [ENT] or move the
ShuttlePoint knob to the right.
4. Move the ShuttlePoint knob to highlight
CHART PAGE and press [ENT] or move the
ShuttlePoint knob to the right.
5. Select the desired window,
HIGHWAY or COMPASS, and press [ENT] or move the
ShuttlePoint knob to the right.
6. Press [CLR] or move the ShuttlePoint knob to exit the menu and show the Chart page.
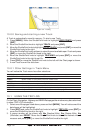
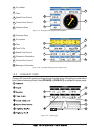
12.0.1 Additional Functions on Chart page
When on the Chart page you will notice icons of Buoys, Towers, Lights, Wrecks, Tide
Stations and Port Icons. If the cursor is moved over the top of these icons a popup window
will be shown with information about the icon.
12.0.2 Turning Off Information on Icon Points
The GPS Chart Plotter allows you to select to see information on points, all items or to turn
this function off.
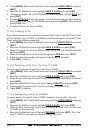
1. To change, press [MENU]. Move the ShuttlePoint knob to highlight
SETUP MENU and
press [ENT].
2. Move the ShuttlePoint knob to highlight
GENERAL SETUP and press [ENT] or move
the ShuttlePoint knob to the right.
3. Move the ShuttlePoint knob to highlight
AUTO INFO and press [ENT] or move the
ShuttlePoint knob to the right.
4. Select the
Off, On Points, or On ALL and press [ENT] or move the ShuttlePoint knob
to the right.
5. Press [CLR] or move the ShuttlePoint knob to the left until the Chart page appears.
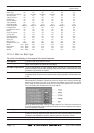
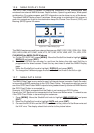
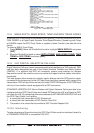
12.0.3 Display Mode
Selects from a pre-defined table what cartographic objects are displayed and which display
options are set. Pre-programmed settings are user selectable from Full, Medium, Low,
Radar (reduces the information on the display to simulate items that would be shown on a
RADAR display. Please note this function is not actually showing RADAR information it is
only showing what typically would be shown by a separate dedicated RADAR display),
Tides, Custom (default mode).
The table below shows the selections for each mode.
1. To change to one of the pre-programmed settings, press [MENU]. Move the Shuttle-
Point knob to highlight
SETUP MENU and press [ENT].
2. Move the ShuttlePoint knob to highlight
MAP CONFIGURATIONS and press [ENT] or
move the ShuttlePoint knob to the right.
3. Move the ShuttlePoint knob to highlight
DISPLAY MODE and press [ENT] or move the
ShuttlePoint knob to the right.
4. Move the ShuttlePoint knob up or down to select the preset and press [ENT].
5. Press [CLR] or move the ShuttlePoint knob to the right until the Chart page is shown.