


Page 56 CP500
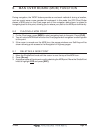
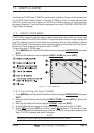
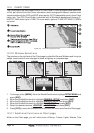
Figure 10.0 - Tracking
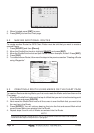
10.0.0 Saving and starting a new Track
A Track is automatically saved to memory. To start a new Track:
1. Press [MENU]. Move the ShuttlePoint knob to highlight
USER POINTS and press
[ENT].
2. Move the ShuttlePoint knob to highlight
TRACK and press [ENT].
3. Move the ShuttlePoint knob to highlight
ACTIVE TRACK and press [ENT] or move the
ShuttlePoint knob to the right.
4. Move the ShuttlePoint knob up/down to select the next available open Track and press
[ENT] or move the ShuttlePoint knob to the right.
5. Move the ShuttlePoint knob to highlight
TRACKING and press [ENT]. Move the
ShuttlePoint knob to set On and press [ENT].
6. Press [CLR] or move the ShuttlePoint knob to the left until the Chart page is shown.
7. A new Track now will be laid down.
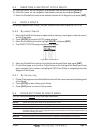
10.0.1 Other Settings in Track Menu
You will notice the Track menu has other selections:
TRACKING Allows turning on or off the tracking function
ACTIVE TRACK This selection allows you to save a Track to one of the 5 Tracks available
VISIBLE Shows or hides a Track shown in ACTIVE TRACK menu
LINE COLOR Selects the color of the Track line
DELETE Deletes a Track selected in the ACTIVE TRACK menu
STEP UNIT Allowable selection are Distance or Time
DISTANCE Setup the Distance interval the Track point is placed on the Chart page
TIME Setup the TIME interval the Track point is placed on the Chart page
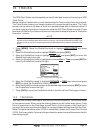
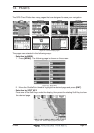
10.1 USING THE TRIP LOG
On the Chart, Navigation, Highway and NMEA Data pages the windows may be customized
to show TRIP LOG information.
1. Select one of the pages listed above, press and hold [MENU]. You will notice one of the
data boxes will be highlighted.
2. Press [ENT] and move the ShuttlePoint knob to highlight
TRIP LOG, press [ENT].
3. A popup window will be shown with
Nm (Nautical Mile), Sm (Statute Mile), Km
(Kilometer) and
RESET. Move the ShuttlePoint knob to select the desired units of
measure and press [ENT].