


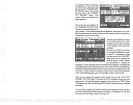

DISPLAY
-
General
The
lights
are turned on
for
approximately
ten
seconds when the
UltraNav
II is first
turned on.
Menus
appear
at
the same time. To
keep
the
lights on,
press
the
key adjacent
to the
Light
label. It controls the
backlighting
used
on the
display
and
keyboard.
If
you
don't want the
lights on,
wait ten
seconds and the
lights
will
automatically
turn themselves
offh
menus
will also
disappear
after ten
seconds,
or
you
can turn
them off
by pressing
the
CLEAR
key
atthe bottom of
_______________________________
the screen
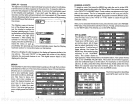
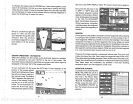
The
Display
menu at the
bot-
tom of the
screen lets
you
ad-
just
the
display's
contrast for
the best
viewing angle.
Press
_________________
ingthe
left arrow
keydecreases
4JGHT
ON
ii1JJJ
the
contrast,
the
right
arrow
increases it.
After
setting
the
contrast for
the best
viewing
SO.,
angle, press
the CLEAR
key
to
Ii
LIT
I
ORK-
I
erase the menu or
wait
ap-
proximately
ten seconds
and it will
automatically
erase.
Contrast section for
more information on this
feature.
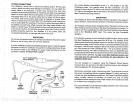
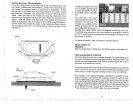
When the UltraNav II
is first turned
on,
the
display
will
appear
similarto the
one above.
The word "AUTO"
in the
upper
left corner of the
display
indicates
the automatic
feature is on. The
digital
bottom
depth
is also
displayed
in this box.
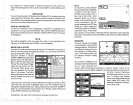
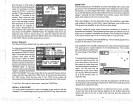
MENUS
The UltraNav II uses
menus
extensivelyto guideyou through
thefunctions
and features
of the unit. The menu
key
accesses
many
of these
features,
allowing you
to
customize the
unit to
your particular
needs
andwaterconditions.
Although
you may
have to leave
one
menu
and enter another
to
reach the desired
function,
all
you
have to do is
press
the
menu
key
to select
the next
menu. if
you
ever
get
lost in a
menu,
simply pressthe
CLEAR
key.
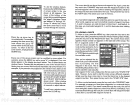
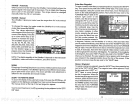
ERASING A ROUTE
To
create a
route,
first
press
the
MENU
key
while the unit is in the GPS
mode.
Next,
press
the
key
next to the "More" label. Now
press
the
key
next
tothe
"ROUTE PLANNING"
label.
Route numberone
appears
on the
right
side of the
screen.
The list of
waypoints
used in
the route are shown
beneath the route number and name, If
you
wish to erase a different
route,
press
the
key
next to the "+RTE" or "-RTE" labels to
cycle through
the
available routes.
After
you've
selected the desired
route,
press
the
key
next to the "ERASE
RTE" label. This erases the route from
memory. Finally, press
the
key
next
to the "EXIT" label. This returns
you
to the GPS
display.
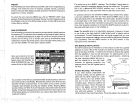
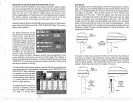
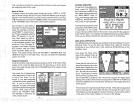
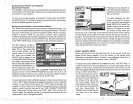
GPS ALARMS
The UltraNav il's GPS receiver
has an Arrival
Alarm,
Cross
Track Error
(XTE)
Alarm,
and
an Anchor Alarm. All of these
alarms
adjust identically
to the
sonar alarms. To
adjust any
of
these
alarms,
first
press
the
MENU
key.
Now
press
the
key
adjacent.to
the "ALARMS"
menu. The screen shown at
right appears.
Press the
key
next to the desired alarm. Now
press
the
key
next to the "CHANGE VALUE" label. The screen shown below
appears.
Use the numbered
keys
to set the alarm. For
example,
to set the arrival
alarm to .2
miles, press
the 0
key,
then the 2
key; finally press
the 0
key.
When
the desired value has been
entered,
press
the
key
next to the
"ENTER" label. The unit returns to the ALARMS screen.
Thefollowing
section describes
each GPS alarm and its limits.
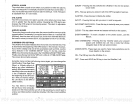
2.2F'T
.. -u
See the
Display
ADJUST CHART SPEED
ADJUST; GRAYLI "lE
ALARMS
ADJUST 0
:SPLAY COl'
NUMERIC;KEYS TOII
CHANGE VALUE. USE
RIGHT ARROW
TO
BACKSPACE.
TURN F]
'RAST
SH ID 3
PAGE 1
8
69
PDF compression, OCR, web-optimization with CVISION's PdfCompressor