


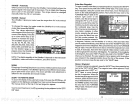

RANGE
-
Automatic
When
turned on for the
first
time,
the
UltraNav II
automatically places
the
bottom
signal
in the
lower half of the
screen. This is called
Auto
Ranging
and is
part
of the
automatic
function. The
range
cannot be
changed
manually
while the
unit is in
automatic.
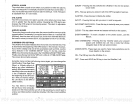
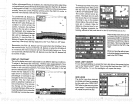
RANGE
-
Manual
The UltraNav II
gives
you
control over the
range
when
its in the
manual
mode.
To
change
the
range,
first
make certain the
UltraNav
mode.
Next,
pressthe
RANGE
key.
The
range adjustment
menu
appears
iii the
lower
right
cornerof the
display.
Press the
up
or down arrow
keys
to de-
crease or increase
the
range.
The available
ranges
are
0-5,
10, 20, 30,
40, 60,
100, 150,
200,300,500,800,1000, 1500,
2000, 3000,
and 5000
feet. Af-
ter the desired
range
is
dis-
played, press
the
CLEAR
key
to erase the
range
menu.
NOTE: The
depth
capability
of the UltraNav II
depends
on the
transducer
installation,
water and
bottom
conditions,
and other factors.
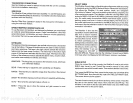
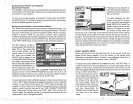
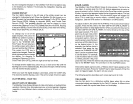
ZOOM
Enlarging or"zooming"the
picture
is acommon
method used to show
small
detail and fish
signals.
The UltraNav II
gives you
two different zoom
sizes,
plus
a
split
screen zoom
option.
The
zoom
operation
and
adjustment
is
different in the automatic
and manual
modes.
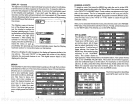
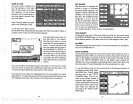
ZOOM
AUTOMATIC MODE
To zoom the
display
in the
automatic
mode,
first
press
the
ZOOM
key.
All
targets
on the
display
are
enlarged
four times
normal size
automatically.
The menus shown at the
top
of
the
next
page
also
appear.
Turn the zoom feature on
(or
off) by pressing
the
key adjacent
to the "OFF!
ON" label.
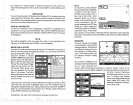
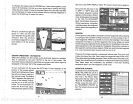
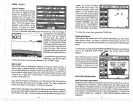
H
Enter New
Waypoint
To save a
location otherthan
your present position,
first
press
the WAYPT
key.
Then
press
the
key
next to the 'WPT SAVE"
label. The screen
shown
below
appears. Using
the
up
and down
arrow
keys,
move the black
box
down
to the
latitude/longitude
"CHANGE FIELD" label at the
bottom
right
corner of the
screen. Use the arrow
keys
to
change
the "N" to a
"S",
if
your
latitude is
south.
Now
enter the
location
you
wish to save
using
the numbered
keys.
Use the
left
arrow
key
as a
backspace
if
you
make a mistake. In other
words,
pressing
the left arrow
key
moves the black box over
the
last number entered. No-
tice that the
position
entered is
.,I
I:,i+#
NAME
IJ
LAT
L0N
N !—°——,———'
...TTTCT
in
degrees, minutes,
and
hundredths of a minute.
(Not
seconds!)
After
you've
entered the
latitude, press
the
key
nextto the
"ACCEPT" label. The
waypoint
save menu
reappears. Next,
press
the
key
nextto the "CHANGE
FIELD"
label. Press the down arrow
key
to switch
the
longitude
from west
to
east,
if
necessary.
Now enter the
longitude.
Make
certain to add a
zero
to the
longitude
if it's less than 100
degrees.
For
example,
if the
longitude
is 85
degrees,
then enter "085".
Press the
key
next to the
"ACCEPT" label
when
you've
finished. The save
waypoint
menu
appears
with the
position
you
entered in the
waypoint position
box at the
top
of
the screen. If this
position
is
correct, press
the
key
next to the "SAVE"
label.
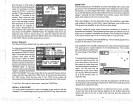
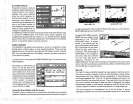
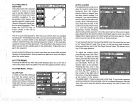
Name a
Waypoint
To
assign
a name to a
waypoint, press
the WAYPT
key,
then
press
the
key
next to the
'WPT SAVE" label. The
waypoint
save menu
appears.
Press
the
key
next to the "+WPT" or
WPT"
label to move
through
the list of
waypoints.
When the
desired
waypointappears
inthe
wibdow,
press
the down arrow
key
until the black box movesto
the "NAME"
position
Now
press
the
key
next to the
"CHANGE
FIELD" label. The
screen shown
at
right appears.
position.
Now
press
the
key
next to the
II is in the
manual
USE NUMERIC
KEYS
TO
CHANGE LJALUE
UP=
"N1' Q=
14
63
PDF compression, OCR, web-optimization with CVISION's PdfCompressor