Changing the Aperture . . . continued
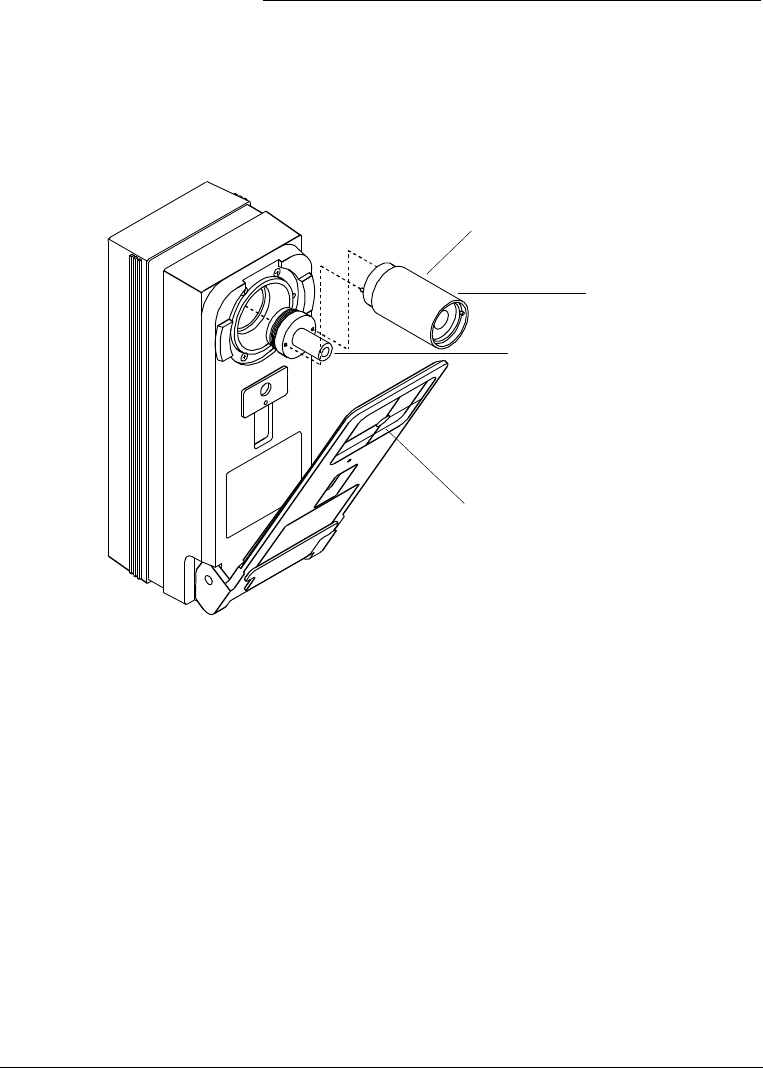
3) Unscrew the existing aperture [5] with the aperture wrench [6].
Note: The aperture wrench tool has two sides, one side fits the 8mm
aperture and the other fits the 20mm aperture.
The aperture wrench has two pins that fit into the holes in the aperture.
4) Screw in the new aperture using the aperture wrench. IMPORTANT!
The new aperture must be clean.
5) Attach the new nose piece to the housing with two thumb screws.
Note: When you tighten the thumb screws, be sure that the nose piece is
flush against the housing. Gently tighten one screw, then the other. Then
finish tightening both screws. IMPORTANT! The new nose piece must
be clean.
6) Replace the existing target window [7] with the new target window.
Refer to Section 8.4, Target Window Replacement for this
procedure.
Note: If you switch back and forth between the 4mm and 8mm aperture,
it is possible to use the 8mm target window with the 4mm aperture.
7) Refer to next page to change aperture setting.
8-7
[6]
[5]
[7]
Insert pins into the holes in the
aperture, then turn
counterclockwise to remove.


