Chapter 5
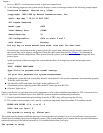
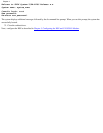
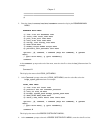
To recover from the error, start
RSN
by executing the
/
usr
/stratus/
rsn
/bin/
rsnon
command at the operating system # prompt. Then execute the
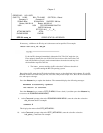
/usr/stratus/rsn/bin/rsnadmin command to display the RSNADMIN MAIN MENU .
Enter 4 to display the SITE_INFO MENU . You can now set the hub phone number by entering 2
at the Command: prompt.
If you do not have a direct outside telephone, have one installed as soon as possible. You can route hub
calls through a PBX, but this may cause the following problems:
Data loss
An unstable connection
Inability of your module to contact the hub with problem reports
Inability of the CAC to dial in to your system after you report problems
In order to send the installation report, you can route the RSN calls through PBX, but you risk all of the
above problems over the long term unless a direct line is installed. If you do route RSN calls through a
PBX, set the hub number so that it dials the proper prefix, followed by a comma and a numeral one (9,1;
99,1; or 8,1; etc.), to wait for an outside line dial tone. For example:
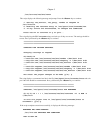
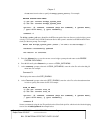
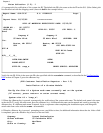
Command: 2
Enter new hub phone 1: 9,18008515125
Database successfully updated
Hit Return to continue.
Press the <Return> key to save the new hub phone number. Press 0 followed by the <Return> key to
return to SITE_INFO MENU .
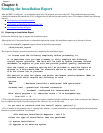
At the Command: prompt at the end of SITE_INFO MENU , enter the value 4 to select the RSN
password menu item. For example:
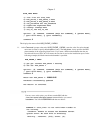
Command: 4
The system then prompts you to enter an RSN password. The rsn_password value enables the
supporting hub to remotely service your machine. Note that the RSN password can contain only numbers
and letters.
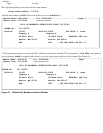
Enter new rsn_password: rsn4321
Database successfully updated
Hit Return to continue.
Record the RSN password; you will need to enter the password in the installation report, as described
later in this chapter.
Press the <Return> key to save the new RSN password. Enter a slash (/ ) and then press the <Return> key
to return to RSNADMIN MAIN MENU .
At the Command: prompt at the end of RSNADMIN MAIN MENU , enter the value 5 to select the
notify_list menu item. The notify list enables you to specify who should receive mail or messages
when the RSN encounters any problems or if there is unsolicited incoming RSN modem traffic (for
example, when a supporting hub calls your site). For example:
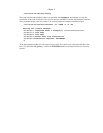
13.
12.


