


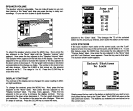

Press the
key adjacent
to the
"Temp Disp.
On" label to turn the tern- b. Attach the Z-9500's
power
cable
directly
to the
battery
perature display
on. The screen will clear and
begin scrolling
echoes
across the
display.
The
digital temperature
can be seen in the
upper
left corner of the screen. It will
display
the
temperature
in
degrees
Fahrenheit.
If
you
wish to
change
to
degrees
Celsius,
go
back to the
Temperature
menu and
press
the
key
next to the
"Temp
in
Deg.
C"
label.
The
digital temperature
will
display
in
degrees
C.
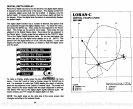
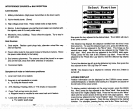
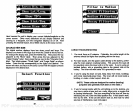
DISTANCE
LOG
Using
the information from the
optional speed
sensor,
the Z-9500
automatically keeps
track of the distance traveled.
When the Z-9500 is first turned
on,
the Distance
Log display
is off. To
turn it
on,
first
press
the MENU
key.
Next,
press
the
key adjacent
to
the "More" label. This
brings up
the second menu
page.
Now
press
the
key adjacent
to the
"Digital Display"
label.
Next,
press
the
key
adjacent
to the "More" label.
Finally, press
the
key
next to the
"Dis-
tance
Log"
label.
c.
Try
an alternator lifter
d. Add the external
ground
wire to the bran module.
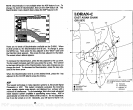
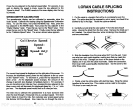
LORAN MODULE EXTERNAL GROUND INSTRUCTIONS
A
ground lug
is attached to the side of the loran module. To use the
external
grounding system,
the
following grounding techniques
are
listed in order of their
preference.
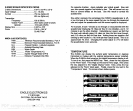
1.
The best
technique
is to use a
grounding
plate
with the external
ground
attached to this
plate placed
in the water.
2. The next
preferred
is to
externally ground
to the lower unit of the
motor or inboard/outboard.
3. The
ground
on the boat
battery may
also be used for external
grounding.
4.
Any part
of the hull of the boat that is metallic and
in
contact
with
water is also
acceptable
for
attaching
the external
ground.
We do not recommend that
you ground
under the console
of the boat.
To
test the
degree
of
improved
function of the
Loran,
the
following
test
should be conducted:
1. Start
your
unit with the external
ground
of the
coupler
disconnected.
At a known latitude and
longitude,
allow the unit to lock onto the known
stations
(check
to make sure that the TO's are correct for this known
location)
and
acquire
and convert to the
known latitude and
longitude
of
your
location.
2. Allow the unit to run for several minutes and make note
of the
strengths (SNR's)
of the stations
you
are
using.
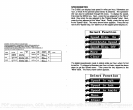
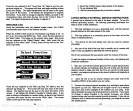
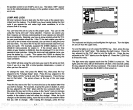
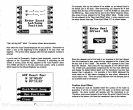
Press the
key adjacent
to the "Dist
Log Disp
On" label to turn the
distance
log display
on. The screen will clear and retum to the sonar
display.
The distance
log
can be
seen in
the
upper
left corner of the
screen. It
will
display
the distance travelled
in statute miles. If
you
wish
to
change
to kilometers or nautical
miles, go
back to the Distance
Log
menu and
press
the
key
next to the "More" label. The screen
shown at the
top
of
the next
page appears.
3. Connect the external
ground according
to a
technique
listed above
and
power up your
unit. Allow the unit to
again
run for 3 to 5 minutes
and make note of the
strengths
of the stations
you
are
using.
If
the
signal strengths
increase,
the external
ground
is
preferred.
If
you
notice
no
change
in
signal strengths
or the
signals
decrease,
you
should
recheck where
you
have the external
ground
connected.
If
you
see no
difference with or without the external
grounding, you really
do not need
this added
ground.
34 103
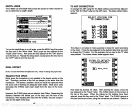
Select Function
'Dst
Log Disp
On
Beset Ost
Log
k...Dst
Log Disp
OFF I
More
Clear
PDF compression, OCR, web-optimization with CVISION's PdfCompressor