


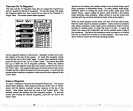

IMPORTANT SERVICE INFORMATION!
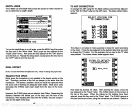
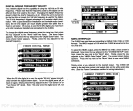
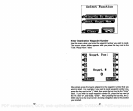
This is the
waypoint
selection
menu. It lets
you pick
the
waypoints
to be
If
your
unit is not
working,
or if
you
need technical
help, please
use the
following troubleshooting
section before
contacting
a service center or
the
factory
customer service
department.
It
may
save
you
the trouble
of
returning your
unit.
SONAR
TROUBLESHOOTING
Unit won't turn on:
1. Check the
power
cable's connection at the unit. Also check
the
wiring.
2. Make certain the
power
cable is wired
properly.
The red wire
connects to the
positive battery terminal,
black to
negative
or
ground.
3. Check
the fuse.
4. Measurethe
battery voltage
at the unit's
power
connector. It should
be at least 11 volts. If it
isn't,
the
wiring
to the unit is
defective,
the
battery
terminals or
wiring
on the terminals are
corroded,
or the
battery
needs
charging.
Unit
freezes,
locks
up,
or
operates erratically:
1. Electrical noise from the boat's
motor,
trolling
motor,
or an acces-
sory may
be
interfering
with the sonar unit.
Re-routing
the
power
and
transducer cables
away
from other electrical
wiring
on the
boat
may
help.
Route the sonar unit's
power
cable
directly
to the
battery
instead
of
through
a fuse block or
ignition
switch
2.
Inspect
the transducer cable for
breaks, cuts,
or
pinched
wires.
3. Check
both the transducer and
power
connectors. Make certain
both are
securely plugged
in to the unit.
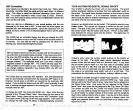
Weak bottom
echo,
digital readings
erratic,
or no fish
signals:
1. Make certain transducer is
pointing straight
down. Clean the face of
the transducer.
Oil, dirt,
and fuel can cause a film to form on the
transducer, reducing
its effectiveness.
If
the transducer is
mounted
used in the route. Press the
keys adjacent
to the
up
or down arrows to
scroll
through
the list of
waypoints.
When the first
waypoint
to be used
in the route
appears
in the selection box at the
top
of the
screen,
press
the
key adjacent
to the "Enter" label.
Continue
selecting waypoints
in
the order
you
wish to travel
in
the
route until all of the desired
waypoints
have been
picked
for the route. Then
press
the
key
next to the "Clear
label.
The
route
is now
ready
for use.
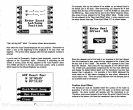
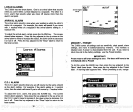
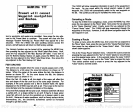
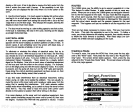
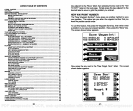
Following
a Route
To follow a saved
route, press
the
MENU
key,
then the
key adjacent
to
the "More" label. Now
press
the
key adjacent
to the "Route
Planning"
label.
Next,
press
the
key adjacent
to the "Follow Route" label. The
screen
shown
below
appears.
Select
Route
Enter
I
Down I
This is the route selection menu. Choose the route to follow
by pressing
the
keys adjacent
to the
"Up"
or "Down" labels to move the box over the
desired route name. In the
example
above,
the route
"LONG" is se-
lected. Press the
key
next to the "Enter" label to select the route.
The
screen at the
top
of the next
page automatically appears
next.
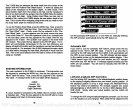
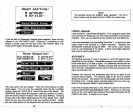
IMPORTANT!
You must select
waypoints
for the route
in the order that
they
are
going
to be used. In other
words, suppose you
want a route that
consists of
waypoint
numbers
1, 3,
and 5. But
you
wish to travel to
3
first,
then
1,
arid
finally
5.
In this
case,
you
must select
waypoint
3,1,
and
5
(in
that
order)
when
selecting waypoints
for the route.
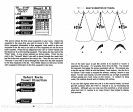
.IJ L"
TUNA—i
WRECK 2
DONS
COVE
MARINA
48
89
PDF compression, OCR, web-optimization with CVISION's PdfCompressor