


© 2011 Schneider Electric. All Rights Reserved.
63230-500-225A2 PowerLogic
TM
Series 800 Power Meter
3/2011 Chapter 6—Alarms
47
Priorities
Each alarm also has a priority level. Use the priorities to distinguish between events that
require immediate action and those that do not require action.
• High priority—if a high priority alarm occurs, the display informs you in two ways: the
LED backlight on the display flashes until you acknowledge the alarm and the alarm
icon blinks while the alarm is active.
• Medium priority—if a medium priority alarm occurs, the alarm icon blinks only while
the alarm is active. Once the alarm becomes inactive, the alarm icon stops blinking and
remains on the display.
• Low priority—if a low priority alarm occurs, the alarm icon blinks only while the alarm is
active. Once the alarm becomes inactive, the alarm icon disappears from the display.
• No priority—if an alarm is set up with no priority, no visible representation will appear
on the display. Alarms with no priority are not entered in the Alarm Log. See Chapter
7—Logging for alarm logging information.
If multiple alarms with different priorities are active at the same time, the display shows the
alarm message for the last alarm that occurred. For instructions on setting up alarms from
the power meter display, see “ALARM (Alarms) Setup” on page 17.
Viewing Alarm Activity and History
Types of Setpoint-controlled Functions
This section describes some common alarm functions to which the following information
applies:
• Values that are too large to fit into the display may require scale factors. For more
information on scale factors, refer to “Changing Scale Factors” on page 91.
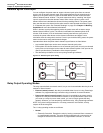
• Relays can be configured as normal, latched, or timed. See “Relay Output Operating
Modes” on page 40 for more information.
• When the alarm occurs, the power meter operates any specified relays. There are two
ways to release relays that are in latched mode:
— Issue a command to de-energize a relay. See Appendix C—Using the Command
Interface on page 83 for instructions on using the command interface, or
— Acknowledge the alarm in the high priority log to release the relays from latched
mode. From the main menu of the display, press ALARM to view and acknowledge
unacknowledged alarms.
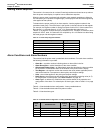
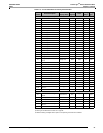
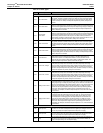
The list that follows shows the types of alarms available for some common alarm functions:
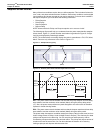
NOTE: Voltage based alarm setpoints depend on your system configuration. Alarm
setpoints for 3-wire systems are V
L-L
values while 4-wire systems are V
L-N
values.
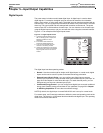
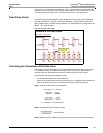
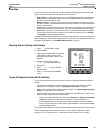
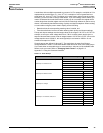
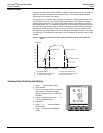
1. Press
###: until ALARM is visible.
2. Press ALARM.
3. View the active alarm listed on the power
meter display. If there are no active
alarms, the screen reads, “NO ACTIVE
ALARM.”
4. If there are active alarms, press
<--or --> to view a different alarm.
5. Press HIST.
6. Press
<-- or --> to view a different
alarm’s history.
7. Press
1; to return to the SUMMARY
screen.
/6%26#.
!#4)6
U
$@XR
()34
PLSD110258