memory storage,
the STAT
message
will read "CHECKSUM". Do
not use
this
waypoint
if a checksum
error
message
is
displayed!
Erase
it and
re-enter the location, If
you
wish to
navigate
to the
displayed waypoint,
simply press
the
key adjacent
to
the ENTER label. The UltraNavGPS
will
return to the last used GPS or Plotter screen
with
navigation
data for the
recalled
waypoint displayed.
To exit
this menu without
recalling
a
waypoint,
press
the
key adjacent
to the CLEAR
label,
ROUTES
The UltraN avG
PS
gives you
the
ability
to travel to several
waypoints
in a
row. This feature is
called Routes. When
you
run a
route,
the UltraNavGPS
gives you navigation
intormation
tothefirstwaypoint
inthe route's list. When
you
come within the
arrival alarm's radius at the first
waypoint,
the arrival
alarm
sounds,
and the
UltraNavGPS
automatically
switches to the next
waypoint
in
the
route. The
process repeats
until all
of the
waypoints
in the
route have been reached.
There are two
steps necessary
to create a route. First select
the route's
number
(from
ito
20).
Then
pickthe waypoints
to use
in the route. To follow
a
route,
you simply
select the route and determine
which
waypoint
in the
route to start
with. Then tell the unit if
you're
going
to
travel forward
through
the route or backward.
After
completing
these
steps,
the UltraNavGPS
will
show
navigation
intormation to the first
waypoint
in the route.
CREATING
A ROUTE
To create
a
route,
first
press
the MENU
key
until the 'ROUTES"
label
appears.
Now
press
the
key adjacent
to that label. The
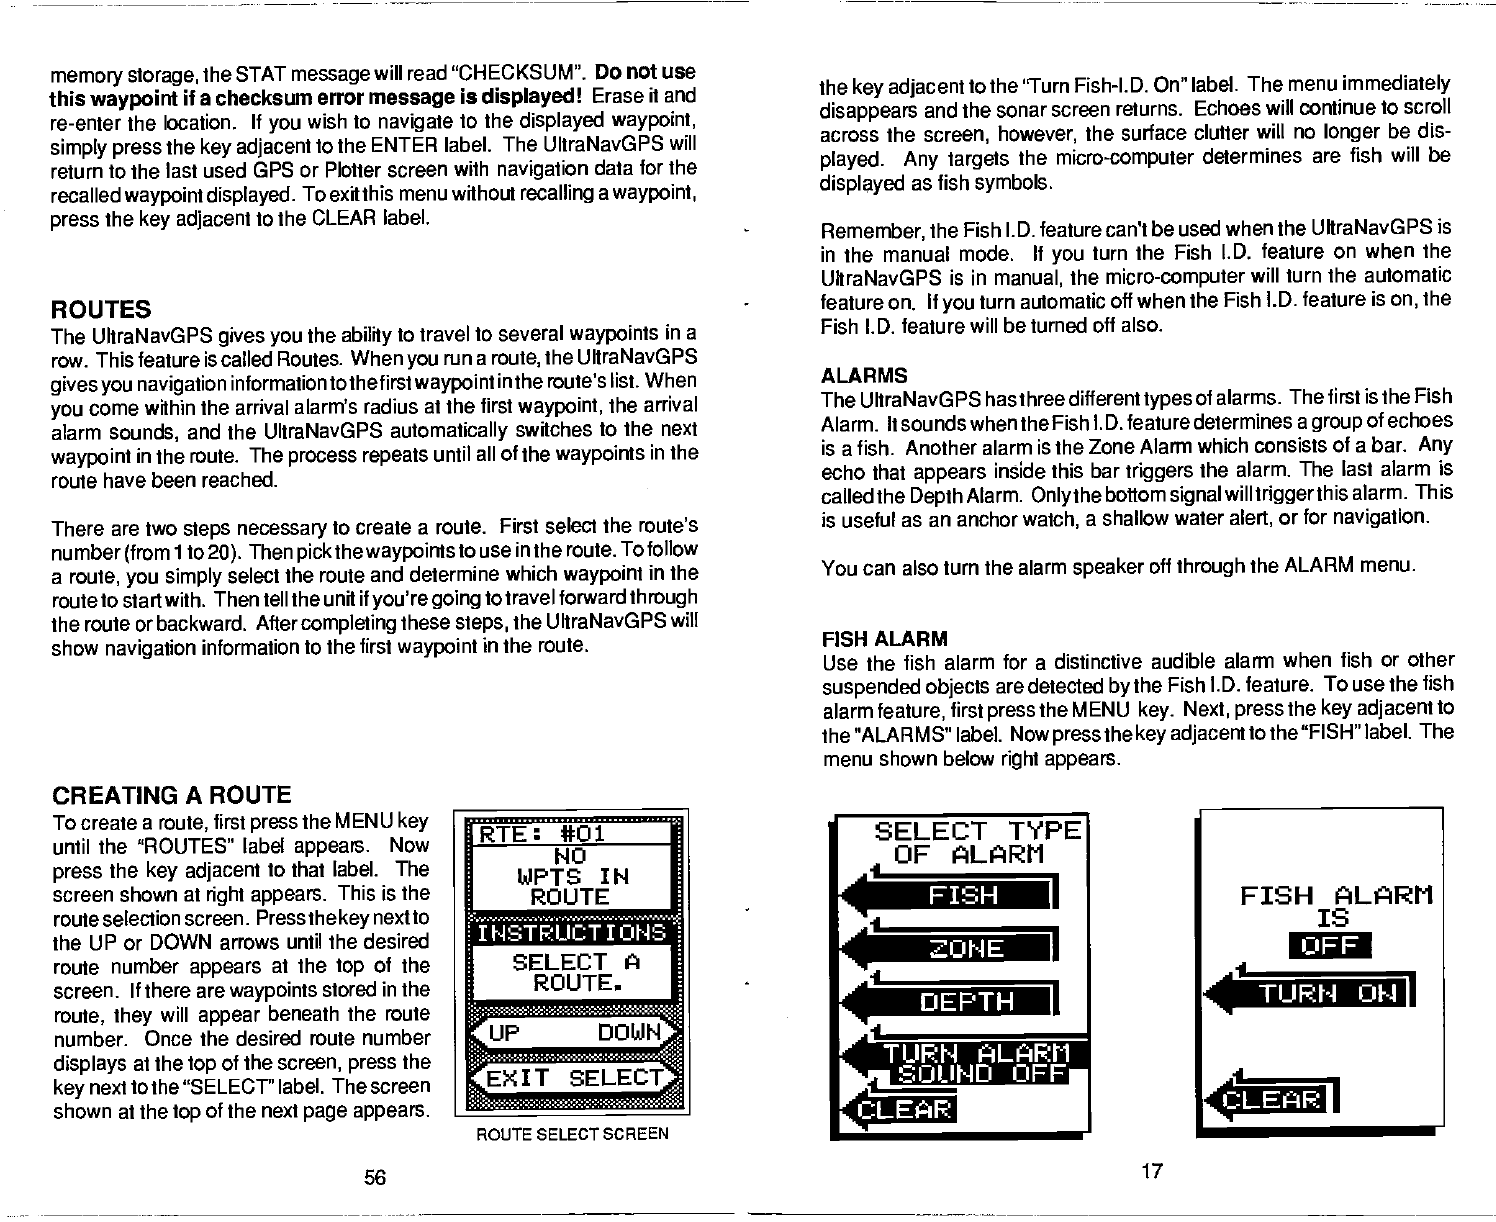
screen shown
at
right appears.
This is the
route selection screen.
Press the
key
nextto
the UP or
DOWN arrows until the desired
route number
appears
at the
top
of the
screen. If there are
waypoints
stored in the
route,
they
will
appear
beneath the route
number. Once the desired
route number
displays
at the
top
of the
screen, press
the
key
next to the "SELECT"
label. The screen
shown at the
top
of the next
page appears.
RTE: #01
140
IIJPTS IN
ROUTE
N
TS
the
key adjacent
to the 'Turn Fish-l.D.
On" label. The
menu
immediately
disappears
and the sonar
screen returns. Echoes
will continue to scroll
across the
screen, however,
the surface clutter wilt no
longer
be dis-
played. Any targets
the
micro-computer
determines
are fish will be
displayed
as fish
symbols.
Remember,
the Fish
I .D. feature can't be used when the UItraNavGPS
is
in the manual mode.
If
you
turn the Fish l.D.
feature on when the
UltraNavGPS is in
manual,
the
micro-computer
will turn the automatic
feature on.
If
you
turn automatic off when the Fish
l.D. feature is
on,
the
Fish I.D. feature
will be turned off also.
ALARMS
The UltraNavGPS
has three different
types
of
alarms. The first is the Fish
Alarm. It sounds
when the Fish I. D. feature
determines a
group
of echoes
is a fish.
Another alarm is the Zone Alarm
which consists of a bar.
Any
echo that
appears
inside this bar
triggers
the alarm.
The last alarm
is
called the
Depth
Alarm.
Onlythe
bottom
signal
will
triggerthis
alarm.
This
is useful
as an anchor
watch,
a shallow
water
alert,
or for
navigation.
You can also turn the alarm
speaker
off
through
the ALARM menu.
FISH ALARM
Use the fish alarm for a distinctive
audible alarm when fish
or other
suspended objects
are detected
by
the Fish I.D. feature.
To use the fish
alarm
feature,
first
press
the MENU
key.
Next,
press
the
key adjacent
to
the "ALARMS" label. Now
pressthe key adjacent
to
the "FISH" label. The
menu shown below
right appears.
-I
-I
I Wi IN1IS S tIWø
SELECT A
ROUTE.
SELECT
TYPE
OF ALARM
ROUTE 5ELEcTScREEN
FISH ALARM
IS
a
TIJRN
OF-I
56
17
a
PDF compression, OCR, web-optimization with CVISION's PdfCompressor


