the
key adjacent
to the 'FIN ISHED" label. The View/Save
Waypoint
screen
shown below
appears
next.
The first
waypoint
number in the list that is
empty appears
at the
top
of
the
page.
This is
the number that the
position
will
be stored
under. The
latitude/longitude
stored
in
this
location shows
directly
beneath the
waypoint
number. Since
there
is no location stored in
this
example,
blanks show
in
the latitude/
longitudewindow.
Beneath
this location is the
position you
entered. If
you
wish to save
this
location under this
waypoint
number,
simply
press
the
key adjacent
to the
ENTER label.
To exit without
saving
the
location, press
the
CLEAR
key.
.
binS
To save the location under a different
waypoint
number,
press
the
key
adjacent
tothe UP label to increasethe
waypoint
number
(i.e.
from
waypoint
number ito
2).
Press the
key adjacent
to the DOWN label to decrease the
waypoint
number. Once
you've
decided the
waypoint
number to save the
location
under,
press
the
key adjacent
to the ENTER label. This will store
the location under the
waypoint
number
you
selected and return to the last
used
sonar, position, plot,
or
navigation
screen.
Go To Lat Lon
If
you
wish to
simply go
to a
location,
but not save it as a
waypoint,
use the
Go To Lat Lon feature on the
Waypoint
Save menu.
After
pressing
the
key
adjacent
to the Go To Lat Lon
label,
the screen shown below
appears.
Using
the numbered
keys,
enter the location's
Use the CLEAR
key
as a
backspace
if
you
make a
mistake. In other
words,
pressing
the
CLEAR
key
erases the last number
entered.
Notice that the
position
entered is in
degrees,
minutes,
and hundredths of a
minute.
(Not
secondsl)
After
you've
entered the last num-
ber,
a new screen
automatically appears.
Press the
key adjacent
tothe "N/S TOGGLE"
to switch the latitude from north to south.
Press the
key adjacent
to the "W/ETOGGLE"
_______________
to switch the
longitude
from west to east. If
the
position
shown at the
top
of the screen is
correct,
press
the
key
next to the "FINISHED"
to the SET SHAL/DEEP label. You can now
adjust
the
bottom of the zone
alarm bar
using
the
keys adjacent
to the
up
and down
arrows.
Once
you've
made the
adjustments,
press
the
CLEAR
key
to erase the
menus.
To turn the Zone Alarm
off,
return to the Zone Alarm
menu,
then
press
the
key adjacent
to the "ALARM OFF" label.
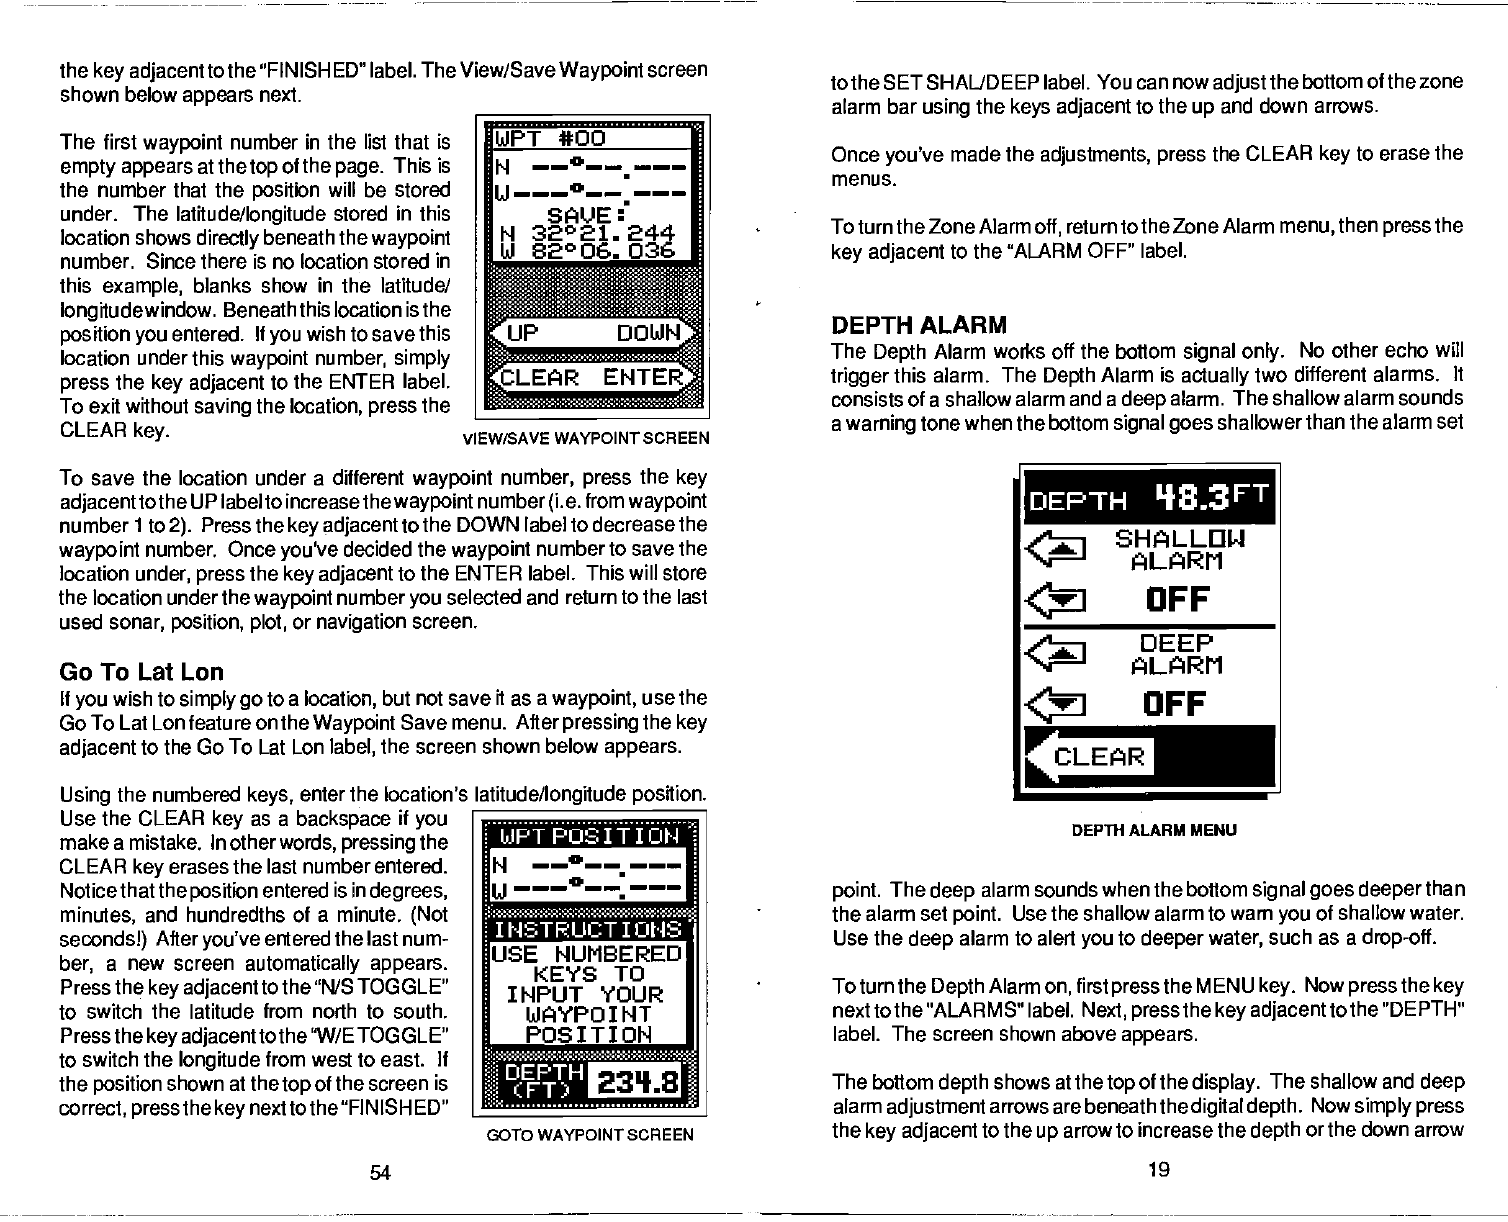
DEPTH ALARM
The
Depth
Alarm works off the bottom
signal only.
No other echo will
trigger
this alarm. The
Depth
Alarm is
actually
two different alarms.
It
consists of a shallow alarm and a
deep
alarm. The shallow alarm sounds
a
warning
tone when the bottom
signal goes
shallowerthan
the alarm set
DEPTH ALARM MENU
point.
The
deep
alarm sounds when the bottom
signal goes deeper
than
the alarm set
point.
Use the shallow alarm to warn
you
of shallow water.
Use the
deep
alarm to alert
you
to
deeper
water,
such as a
drop-off.
To turn the
Depth
Alarm
on,
first
press
the MENU
key.
Now
press
the
key
nexttothe "ALARMS" label.
Next, pressthe key adjacentto
the "DEPTH"
label. The
screen shown above
appears.
The bottom
depth
shows at the
top
of the
display.
The shallow and
deep
alarm
adjustment
arrows are beneath the
digital depth.
Now
simply press
the
key adjacent
to the
up
arrow to increase the
depth
or the down arrow
WPT *00
H
——°——.
u———0
SAVE
I
N
32°21. 244
Ui 82°06. 036
VIEW/SAVE WAYPOINT SCREEN
DEPTH q•3FT
SHALLOW
ALARM
OFF
DEEP
ALARM
OFF
latitude/longitude position.
twa • _-- u •
H
——°——•———
USE NUMBERED
KEYS TO
INPUT YOUR
WAYPOINT
POSITION
3010 WAYPOINT SCREEN
54
19
PDF compression, OCR, web-optimization with CVISION's PdfCompressor


