


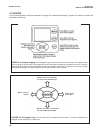
4.3 PROGRAMMING THE ANALYZER—TUTORIAL
Setting up and calibrating the analyzer is easy. The following tutorial describes how to move around in the
programming menus. For practice, the tutorial also describes how to assign ppm chlorine values to the 4 and 20 mA
analog outputs.
MODEL FCL-1056 SECTION 4.0
DISPLAY AND OPERATION
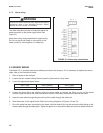
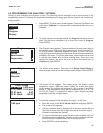
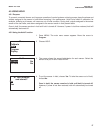
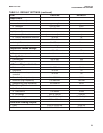
1. Press MENU. The main menu screen appears. There are four items in the
main menu. Calibrate is in reverse video, meaning that the cursor is on
Calibrate.
2. To assign values to the analog outputs, the Program sub-menu must be
open. Use the down navigation key to move the cursor to Program.
Press ENTER.
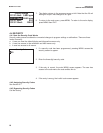
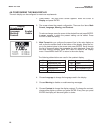
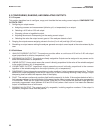
3. The Program menu appears. There are between five and seven items in
the Program menu. Diagnostic Setup appears only if you have the FCL-
02 with pH sensor. The screen displays four items at a time. The down-
ward pointing arrow on the right of the screen shows there are more items
available in the menu. To view the other items, use the down key to scroll
to the last item shown and continue scrolling down. When you have
reached the bottom, the arrow will point up. Move the cursor back to
Outputs and press ENTER.
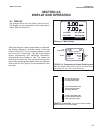
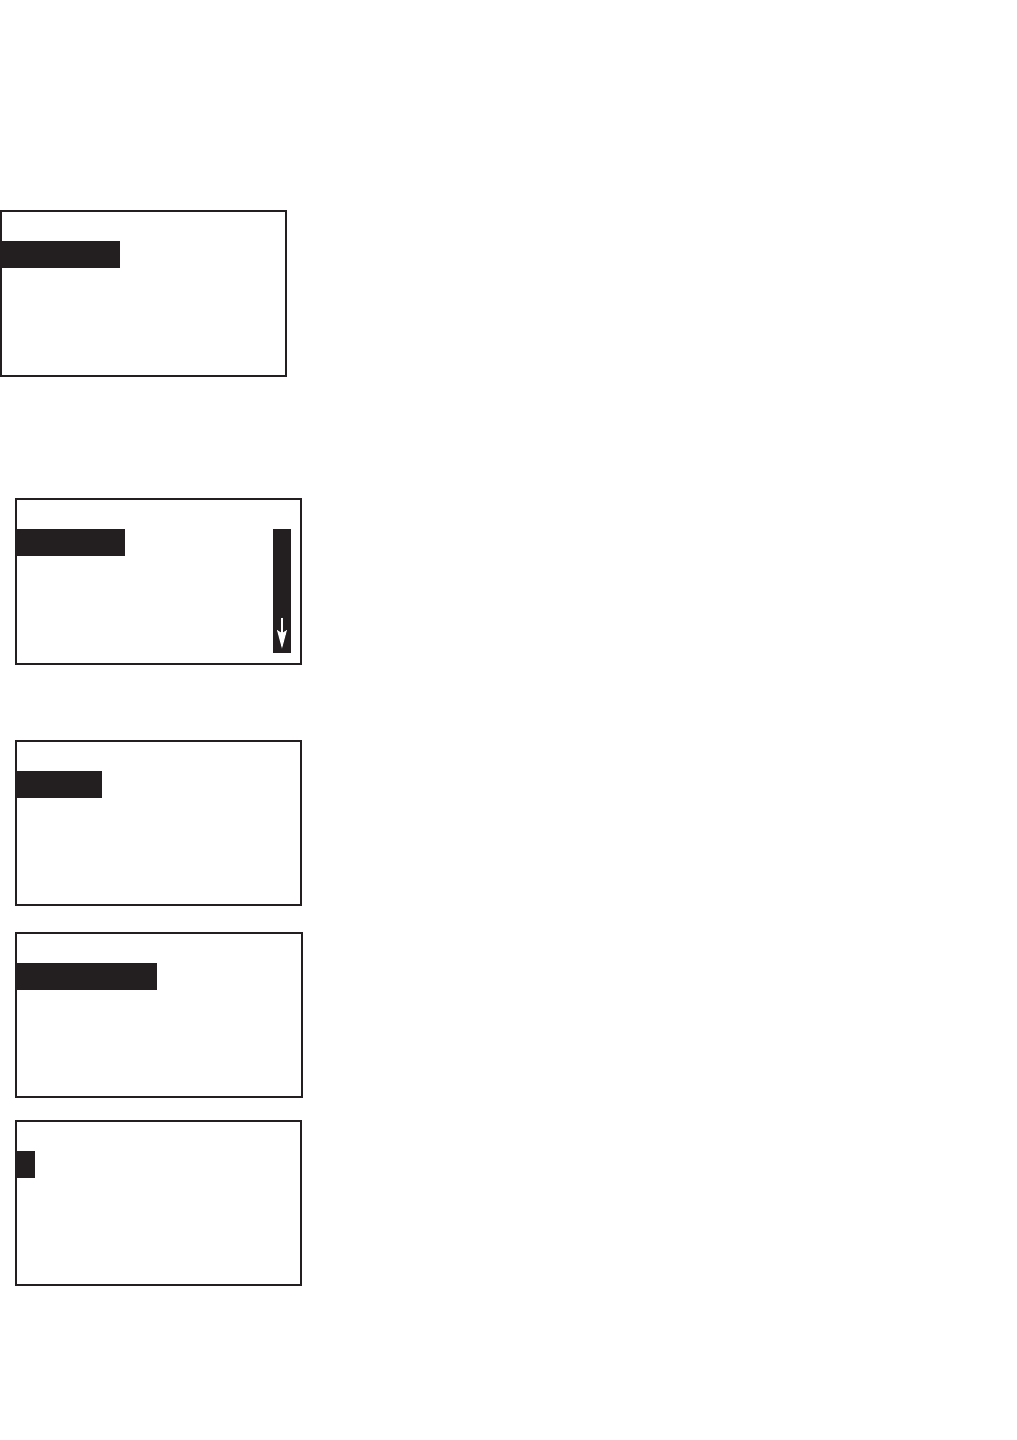
4. The screen at left appears. The cursor is on Range. Output Range is
used to assign values to the low and high current outputs. Press ENTER.
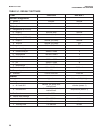
5. The screen at left appears. The screen shows the present values
assigned to output 1 (O1) and output 2 (O2). The screen also shows
which sensors the outputs are assigned to. S1 is sensor 1 and S2 is
sensor 2. The assignments shown are the defaults for the FCL-01. For
the FCL-02, Output 2 is assigned to sensor 2 (pH). Outputs are freely
assignable under the configure menu.
6. For practice, change the 20 mA setting for output 1 to 8.5 ppm.
a. Move the cursor to the O1 S1 20 mA: 10.00 line and press ENTER.
b. The screen at left appears.
c. Use the navigation keys to change 10.00 to 8.5 ppm. Use the left and
right keys to move from digit to digit. Use the up and down keys to
increase or decrease the numeral.
d. To move the decimal point, press the left or right navigation key until
the decimal point is highlighted. Press the up key to move the decimal
point to the right. Press the down key to move to the left.
e. Press ENTER to store the setting.
Menu
Hold
Program
Display
Calibrate
Program
Alarms
Measurement
Temperature
Outputs
Outputs
Configure
Stimulate
Range
Output Range
0.000 ppm
O1 S1 20mA: 10.00 ppm
O2 S1 4mA: 0.0C
O2 S1 20mA: 100.0C
O1 S1 4mA
O1 S1 20 mA
0.00 ppm
1
15