MODEL FCL-1056 SECTION 8.0
MAINTENANCE
54
8.2.1 General.
When used in clean water, the chlorine sensor requires little maintenance. Generally, the sensor needs mainte-
nance when the response becomes sluggish or noisy or when readings drift following calibration. For a sensor
used in potable water, expect to clean the membrane every month and replace the membrane and electrolyte solu-
tion every three months. In water containing large amounts of suspended solids, for example open recirculating
cooling water, membrane cleaning or replacement will be more frequent.
8.2.2 Cleaning the membrane.
Clean the membrane with water sprayed from a wash bottle. Do not use tissues to clean the membrane.
8.2.3 Replacing the electrolyte solution and membrane.
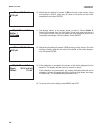
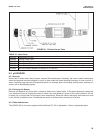
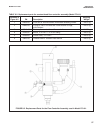
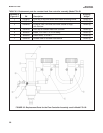
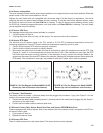
1. Unscrew the membrane retainer and remove the membrane assembly and O-ring. See Figure 8-1.
2. Hold the sensor over a container with the cathode pointing down.
3. Remove the fill plug and allow the electrolyte solution to drain out.
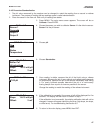
4. Inspect the cathode. If it is tarnished, clean it using a cotton-tipped swab dipped in baking soda or alumina.
Use type A dry powder alumina intended for metallographic polishing of medium and soft metals. Rinse thor-
oughly with water.
5. Wrap the plug with two turns of pipe tape and set aside. Remove old tape first.
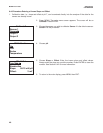
6. Prepare a new membrane. Hold the membrane assembly with the cup formed by the membrane and mem-
brane holder pointing up. Fill the cup with electrolyte solution and allow the wooden ring to soak up the solu-
tion (usually takes several minutes).
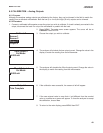
7. Hold the sensor at about a 45-degree angle with the cathode end pointing up. Add electrolyte solution through
the fill hole until the liquid overflows. Tap the sensor near the threads to release trapped air bubbles. Add more
electrolyte solution if necessary.
8. Place the fill plug in the electrolyte port and begin screwing it in. After several threads have engaged, rotate
the sensor so that the cathode is pointing up and continue tightening the fill plug. Do not overtighten.
9. Place a new O-ring in the groove around the cathode post. Cover the holes at the base of the cathode stem
with several drops of electrolyte solution.
10. Insert a small blunt probe, like a toothpick with the end cut off, through the pressure equalizing port. See
Figure 8-1.
NOTE
Do not use a sharp probe. It will puncture the bladder and destroy the sensor.
Gently press the probe against the bladder several times to force liquid through the holes at the base of the
cathode stem. Keep pressing the bladder until no air bubbles can be seen leaving the holes. Be sure the holes
remain covered with electrolyte solution.
11. Place a drop of electrolyte solution on the cathode, then place the membrane assembly over the cathode.
Screw the membrane retainer in place.
12. The sensor may require several hours operating at the polarizing voltage to equilibrate after the electrolyte
solution has been replenished.
8.2 CHLORINE SENSOR
CAUTION
Fill solution may cause irritation. May be harmful if
swallowed. Read and follow manual.


