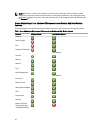
• Minimum Privilege Required
5. Click Apply Changes.
6. Click Advanced Settings to further configure BMC.
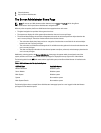
7. In the Serial Over LAN Configuration Advanced Settings window, you may configure the following information:
• Character Accumulate Interval
• Character Send Threshold
8. Click Apply Changes.
9. Click Go Back to Serial Over LAN Configuration to return to the Serial Over LAN Configuration window.
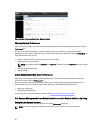
Additional Configuration For iDRAC
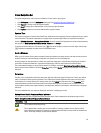
To configure the IPv4 and IPv6 properties using the Additional Configuration tab:
1. Click the Modular Enclosure→ System/Server Module → Main System Chassis/Main System→ Remote Access
object
2. Click the Configuration tab.
3. Click Additional Configuration.
4. Configure the IPv4 and IPv6 properties as Enabled or Disabled.
5. Click Apply Changes.
NOTE: For information about license management, see the
Dell License Manager User’s Guide
available at
dell.com/support/manuals.
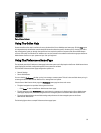
Configuring Remote Access Device Users
To configure Remote Access Device users using the Remote Access page:
1. Click the Modular Enclosure → System/Server Module → Main System Chassis/Main System → Remote Access
object
.
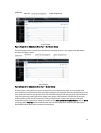
2. Click the Users tab.
The Remote Access Users window displays information about users that can be configured as BMC/iDRAC users.
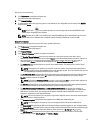
3. Click User ID to configure a new or existing BMC/iDRAC user.
The Remote Access User Configuration window allows you to configure a specific BMC/iDRAC user.
4. Specify the following general information:
• Select Enable User to enable the user.
• Enter the name for the user in the User Name field.
• Select the Change Password check box.
• Enter a new password in the New Password field.
• Re-enter the new password in the Confirm New Password field.
5. Specify the following user privileges:
• Select the maximum LAN user privilege level limit.
• Select the maximum serial port user privilege granted.
• On Dell PowerEdge 9G systems, select Enable Serial Over LAN to enable Serial Over LAN.
6. Specify the User group for DRAC/iDRAC user privileges.
7. Click Apply Changes to save changes.
8. Click Back to Remote Access User Window to go back to the Remote Access Users window.
61