


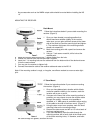
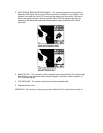

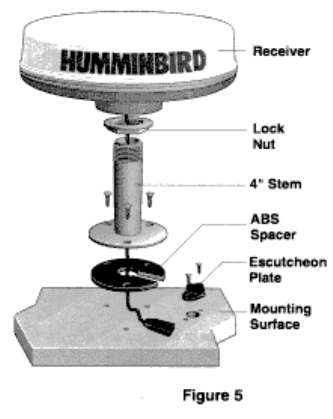
6. Place the stem mount with either the spacer or the rubber gasket over the mounting holes
and fasten using the mounting screws provided. If the spacer is used, the receiver must be
held in close proximity to the stem mount so that the cable may be routed through the gap in
the side of the spacer prior to installing the screws.
7. Install the locking nut (inverted) onto the stem mount.
8. Install the receiver onto the stem mount by tightening clockwise being careful not to bind or
over-twist the cable.
9. With the receiver fully seated, tighten the locking nut against the base of the receiver.
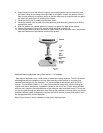
10. Fasten the extension cable to the receiver cable and route to the NS 10.
11. If the receiver cable must enter the deck at a point other than at the stem mount, escutcheon
plate and fasteners are provided to seal that hole as well.
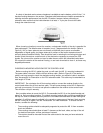
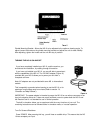
Additional Mounting Methods Using Other Marine 1”-14 Hardware
Most marine distributors carry a wide variety of antenna mounting hardware. The NS 10 receiver
was designed with this hardware in mind to allow mounting of the receiver on any boat. Any
hardware item designed to fit a standard 1”-14 marine female thread will work with the NS 10
receiver. This hardware includes 1, 2, 4, and 8 feet extension masts which allow mounting the
receiver well above obstructions. Installation is similar to the use of the 4"”stem mount provided
with your unit, however, the inside diameter of the extension mast must be at least 1½”if you plan
to route the cable through the extension mast. Be sure that whatever mounting option you choose
provides sufficient rigidity to support the receiver and hold it securely in place and protect it from
low hanging branches or other obstacles.
Note: Ensure that any mount hardware be high quality stainless steel.