Upgrading Your System 4-33
Installing a 5 1/4-Inch Device or 3 1/2-Inch Diskette Drive
Install a 5 1/4-inch device or 3 1/2-inch diskette drive as follows.
!
CAUTION
CD-ROM devices contain a laser system and are classified as
CLASS 1 LASER PRODUCTS. In case of any trouble with a CD-
ROM, please contact your nearest service representative. To
prevent direct exposure to the laser beam, do not try to open the
enclosure.
Use of controls or adjustments or performance of procedures other
than those recommended by the manufacturer may result in
hazardous radiation exposure.
Note:
If you are replacing a diskette drive in Bay E or installing a
diskette drive in bay F, use the internal diskette drive cables
provided with the system. If you are installing a SCSI device in bays
A, B, or C, you must use the internal SCSI cables. Contact your
sales representative or dealer for a list of approved optional
peripheral devices.
1.
Power off the system. Remove the left front door and the top cover as described
earlier.
2.
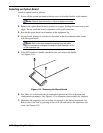
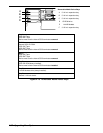
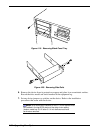
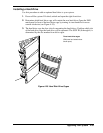
Each empty media or diskette drive bay has a blank panel tray. From the bay where
you want to install a drive, remove the two screws securing the blank panel tray to
the chassis (see Figure 4-19).
Note:
When installing a full height 5 1/4-inch device, remove
two blank panels.
3.
Grasp the blank panel tray and slide it out of the bay.
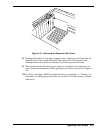
4.
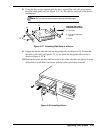
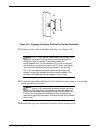
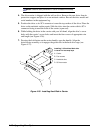
Remove the two screws securing each side rail to the blank panel tray (see Figure 4-
20).
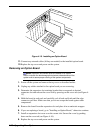
5.
Save the blank panel tray and screws to reuse if you remove a drive from a bay later
and do not reinstall one.


