


41
Using the Main Menu
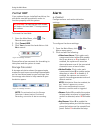
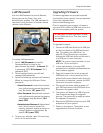
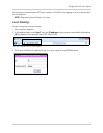
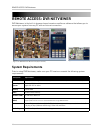
LAN Password
Use the LAN Password to control Remote
Viewing access for Guest, User, and
Administrator profiles. The LAN password is
required if using the built-in browser-based
remote client software.
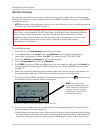
To change LAN passwords:
1. Select LAN Password and use the
Password Wheel to login as the
administrator (by default - 4 channel: ID:
2; password: 2222/ 8/16 channel: ID: 3;
password 3333).
2. Only the administrator can edit and
manage LAN passwords.
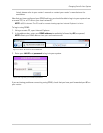
3. Select the following, and use the Password
Wheel to change the LAN user ID and
password:
• Guest Password: Lowest level network
user, with access to remote live viewing
only. By default, ID 7; pass: 1111.
• User Password: Normal level network
user, with access to remote live viewing
and playback only. By default, ID 8;
pass: 2222.
• Administrator Password: Highest level
user, with access to remote live
viewing, playback, and permissions to
change network configurations. By
default, ID 9; pass: 3333
4. To save your settings, right-click until you
return to the main screen.
Upgrading Firmware
Firmware upgrades can provide improved
functionality to your system. You can download
these free upgrades from
www.lorextechnology.com.
Prior to upgrading your system’s firmware,
you must first format the USB flash drive so it
will function properly with the system.
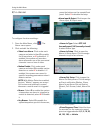
To upgrade firmware:
1. Connect a USB flash drive to the USB port
on the front panel of the DVR and format
(
see “Formatting the USB Drive” on
page 38.) Once formatting is complete,
remove the USB flash drive and connect it
to a USB port on your computer.
NOTE: The system creates two folders on your
USB drive:
Picture
and
Movie
.
2. In your web browser, visit your DVR
manufacturer’s website and download the
free firmware upgrade.
3. Copy the firmware file to the connected
USB flash drive—
do not
place the file in
either the Picture or Movie folder. Once the
file transfer is complete, remove the USB
flash drive from your computer.
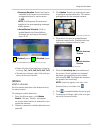
4. Disconnect the power cable to power off
your DVR and connect the USB flash drive.
Reconnect the power cable.
5. The system will detect the USB drive and
new firmware and begin the upgrade
process. The system will prompt you when
the upgrade is complete.
6. Remove the USB flash drive from your DVR
and power off your system.
7. Power on the system. The system is now
upgraded with the new firmware.
Figure 15.3 LAN Passwords
ATTENTION: Formatting erases
all data
on the USB flash drive. This step
cannot
be undone.