


63
Remote Viewing Using Easy Connect
Download the firmware from the Lorex website
1. Go to www.lorexcctv.com and search for LH3xx (where xx is your model #). Download the
latest firmware relevant to your model number.
NOTE: 4-channel firmware is different from the 8 & 16-channel firmware.
2. Extract the firmware to the USB flash drive. Do not extract the firmware into the Pictures or
Movies folder.
NOTE: Firmware ends in a .rom extension.
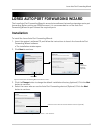
Upgrade the DVR firmware
1. Power down the DVR by unplugging the power cord from the DVR.
2. Insert the USB flash drive into the DVR.
3. Turn on the DVR by plugging the power cord into the DVR.
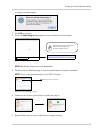
4. Wait for the DVR to detect the USB flash drive. The firmware upgrade automatically begins.
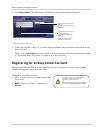
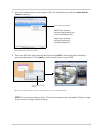
5. Click Yes to begin the firmware upgrade. Wait for the firmware upgrade to finish.
6. Power down the DVR by unplugging the power cord from the DVR and remove the USB flash
drive.
7. Turn on the DVR by plugging the power cord into the DVR.
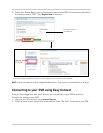
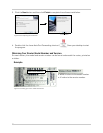
Enabling Easy Connect on your DVR
Once your unit is upgraded with the latest firmware, you can check if Easy Connect is enabled.
By default, Easy Connect is set to ON after the firmware upgrade.
To check if Easy Connect is enabled:
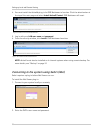
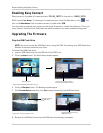
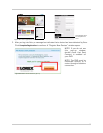
1. Click Menu.
2. Click the LAN icon on the bottom right hand corner of the main menu.
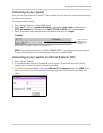
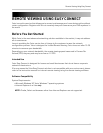
Click Yes to begin
firmware upgrade.
Firmware upgrade progress.
Figure 25.2 : Firmware upgrade window.
LAN icon
Figure 25.3 : Opening the LAN settings.