


64
Remote Viewing Using Easy Connect
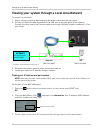
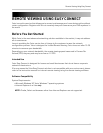
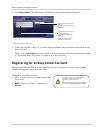
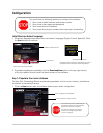
3. Click Easy Connect in the LAN menu. The Easy Connect window opens (Figure 5).
4. Under Yoics Enable, a blue "O" indicates Yoics is enabled. Use the mouse scroll wheel to turn
Yoics on or off.
NOTE: Click on Reset Yoics only if you have a connection problem with Yoics. Changes take effect
in 10 minutes. After 10 minutes, re-login to your Yoics account.
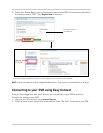
Registering for an Easy Connect account
After you upgrade your DVR with the Yoics Easy Connect firmware, you must create a Yoics
account and register your device with Yoics.
To register your DVR with Yoics:
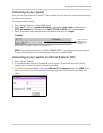
1. Go to http://lorex.yoics.com and register for
an account.
NOTE: There is no "www" in front of the
address.
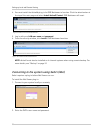
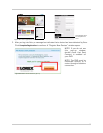
A blue "O" indicates Yoics is
enabled.
A red "X" indicates Yoics is
disabled.
Only click to restart Yoics
service in case of a
connection problem with
Yoics.
Allow 10 minutes for the
changes to take effect.
Figure 25.4: Easy Connect menu.
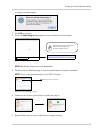
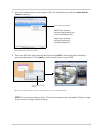
You must connect your DVR to a router
connected to the internet before
registering a Yoics account.
This ensures that upon account activation,
Yoics will automatically detect your DVR.