


19
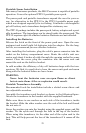
2. The epoxy consists of the epoxy itself and a hardener. Remove the
two compounds from the package and place them on the paper plate.
Thoroughly stir the two compounds together until the mixture has a
uniform color and consistency. Do not mix too fast or bubbles will
form in the epoxy. After mixing, you have 20 minutes to complete the
installation before the epoxy becomes unworkable.
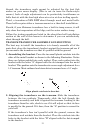
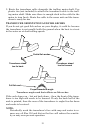
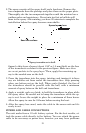
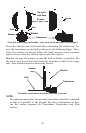
Epoxy transducer to hull.
Spread a thin layer of epoxy (about 1/16" or 1.5 mm thick) on the face
of the transducer as shown in the previous figure. Make sure there
are no air pockets in the epoxy layer! Then, apply the remaining ep-
oxy to the sanded area on the hull.
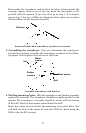
3. Press the transducer into the epoxy, twisting and turning it to force
any air bubbles out from under the transducer face. Stop pressing
when you bottom out on the hull. When you're finished, the face of
the transducer should be parallel with the hull, with a minimum
amount of epoxy between the hull and transducer.
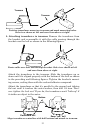
4. Apply a weight, such as a brick, to hold the transducer in place while
the epoxy cures. Be careful not to bump the transducer while the ep-
oxy is wet. Leave the weight in place for a minimum of three hours.
Allow the epoxy to cure for 24 hours before moving the boat.
5. After the epoxy has cured, route the cable to the sonar unit and it's
ready to use.
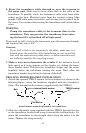
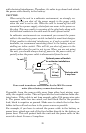
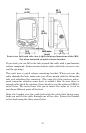
POWER AND CABLE CONNECTIONS
The unit works from a 12-volt battery system. For the best results, at-
tach the power cable directly to the battery. You can attach the power
cable to an accessory or power buss, however you may have problems
Spread epoxy here
Sand this surface