Using the View Window or Whiteboard Window
66
■ Print the IPB document
[A] Confirming print image of the IPB
document before printing
1 Click Print Preview in the File menu.
•The window is switched to the Print Preview
screen.
2 Click [Close] to exit the Print Preview and
return the display mode to the original state.
Note
•The screen image printed is called the Print
Preview. In the Print Preview you can display
print images of multiple page at a time. You
can also expand or reduce the size of the
page displayed in the screen.
[B] Printing currently displayed IPB
document
1 Click Print... in the File menu.
•The Print window appears.
2 Set the Printer, Print range and Number of
copies.
3 Click [OK].
•The Printing window appears.
•To stop the printing, click [Cancel] in the
Printing window.
■ Settings
[A] Setting the meeting information
Allows you to record the meeting information of the
IPB document; titles, subjects and descriptions, etc.
The information can be output with page images when
exporting the IPB documents to HTML files.
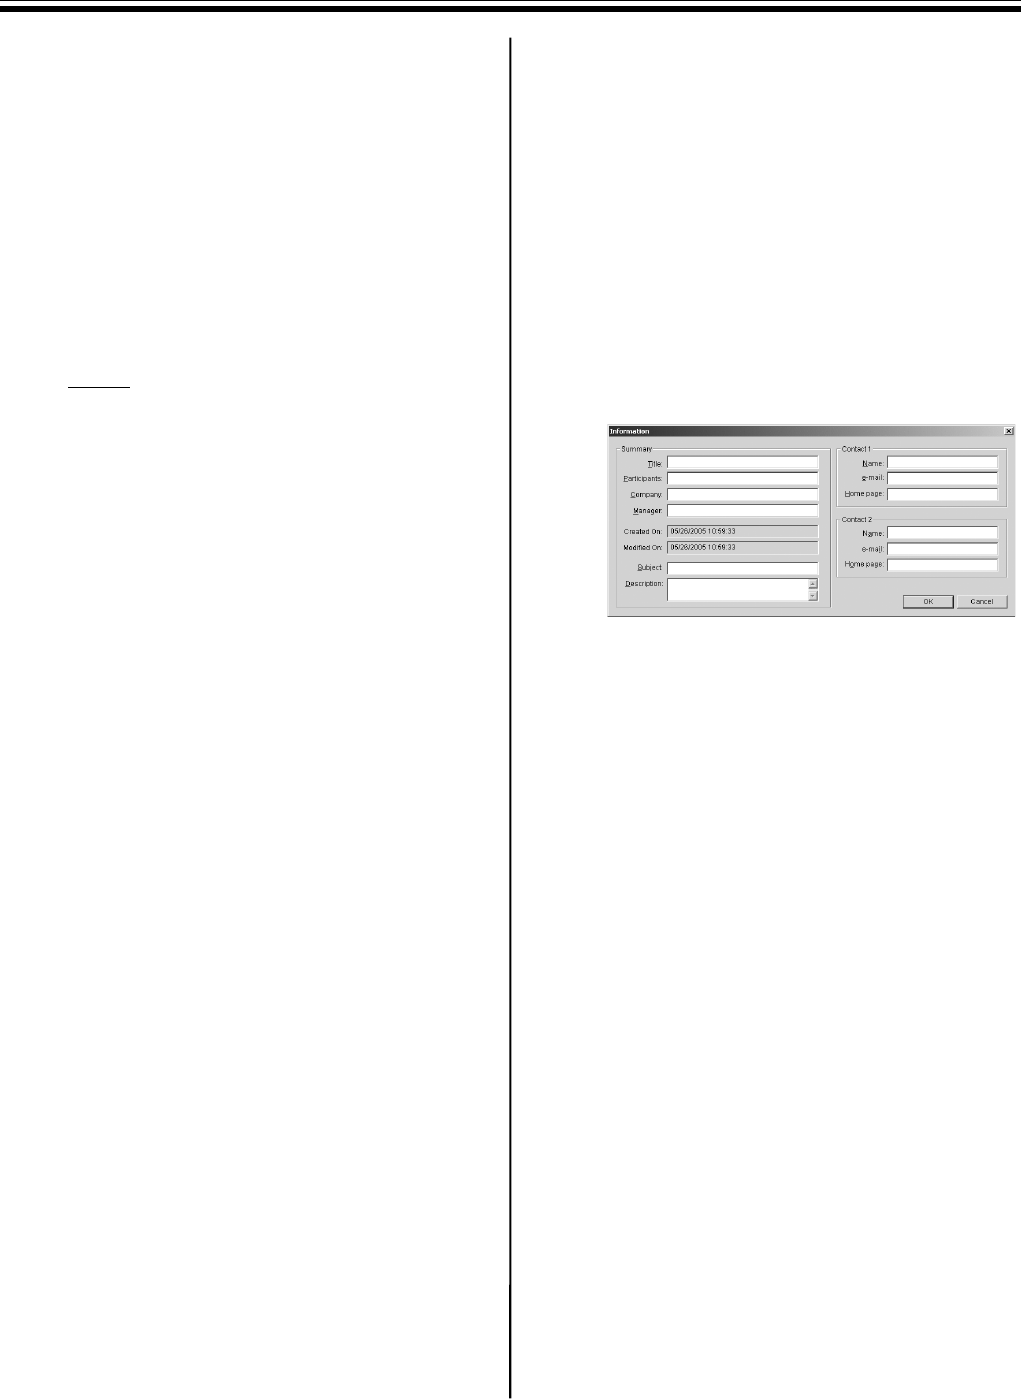
1 Click Information... in the Settings menu.
•The Information window appears.
2 Enter necessary information as follows, and
then click [OK].
•Summary
Enter a summary of the recorded meeting
here.
- Title / Participants / Company / Manager /
Subject / Description:
Enter each item of the meeting.
- Created On:
Automatically displays the date and time
the IPB document was created.
- Modified On:
Automatically displays the date and time
the IPB document was updated finally.
•Contact
Enter information to contact individuals for
questions concerning the meeting here.
- Name:
Enter the names of the person in charge of
the meeting.
- e-mail:
Enter the e-mail address of the person in
charge of the meeting.
- Home page:
Enter the home page of the person in
charge of the meeting.
