Chapter 3 Installing and Configuring
23
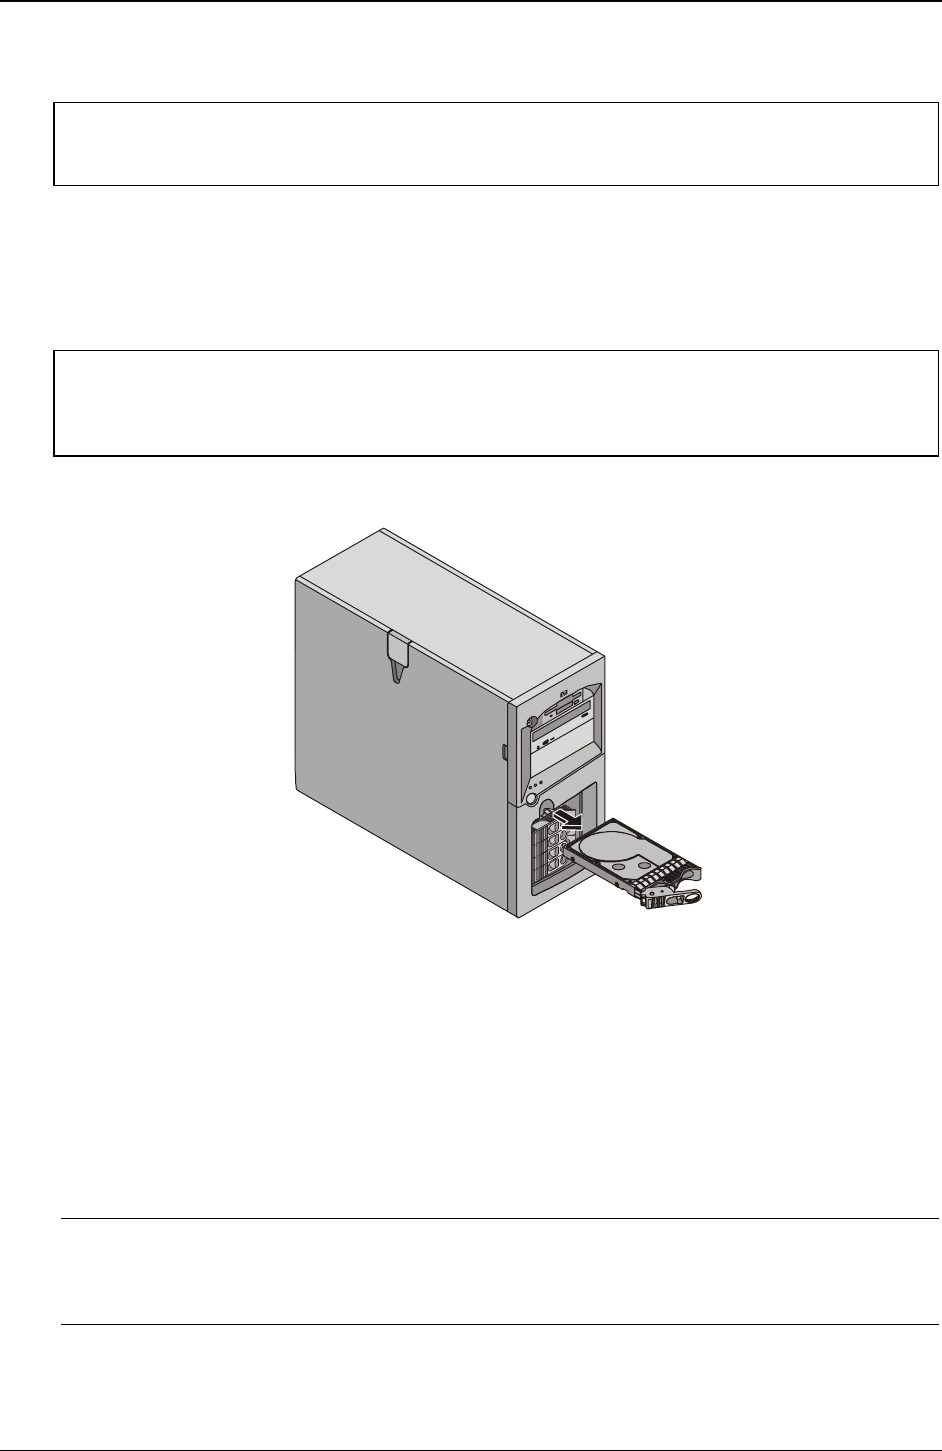
Removing Hot Swap Hard Drives
CAUTION You must remove the drive slowly to ensure the drive heads are parked prior to removal.
Ensure you follow these instructions carefully to prevent handling damage, such as head
slaps or head actuator unlocking.
1. Unlock the hot swap mass storage cage before attempting to remove the drive.
2. To unlock the drive, push the locking latch in and then pull the ejector handle toward you.
3. Gently pull the drive straight out to disengage the power connection.
4. Wait about 30 seconds for the drive to stop spinning and the drive heads to park.
CAUTION You must remove the drive slowly about an inch to disconnect from the back plane and
wait 30 seconds for the drive to stop spinning to ensure the drive heads are parked prior
to removal. Ensure you follow these instructions carefully to prevent handling damage,
such as head slaps or head actuator unlocking.
5. Use your hand to support the bottom of the drive, while you slowly pull the drive straight out. Do not
allow the drive to fall. See Figure 3-12.
Figure 3-12. Removing Hot Swap Hard Drive
6. Place the drive in an electrostatic protected container.
Do not stack drives.
Memory Modules
The HP Server's main memory is implemented using four memory slots on the system board which support
up to 4 GB (1 GB x 4) of memory. The server uses only 3.3V, 168-pin, 133 MHz, buffered, ECC, SDRAM
DIMMs and ships with at least one 128 MB DIMM. The embedded video controller is provided with 8 MB
standard video memory and cannot be upgraded.
NOTE Use only PC 133 (133 MHz), buffered, ECC, SDRAM DIMMs acquired from Hewlett-
Packard. The EDO DIMMs and PC 100 SDRAM DIMMs from earlier HP Server models
will fit into the DIMM slots in the HP Server tc3100, but the EDO DIMMs and PC 100
SDRAM will not function properly and are not supported.


