Chapter 3 Installing and Configuring
36
11. Replace the IO retaining bracket and rotate it to close.
12. Close the PCI card guide retainer if open.
13. Close the side panel.
14. Replace the external cables and power cord.
15. Power up the server and return it to normal operation.
Once the HP server is returned to normal operation, you may need to install software drivers. The drivers for
the new PCI board are either part of your existing server software or included on a flexible disk or CD-ROM
provided with the accessory board.
Removing an Accessory Board
Follow the steps in the preceding section, but instead of installing a card, remove the PCI card and replace the
slot cover.
Racking the Server
Refer to the Server Rack Installation Guide for the information.
Connecting Peripheral Devices
This section provides the instructions for connecting the peripheral devices to the HP Server tc3100.
Monitor, Keyboard, and Mouse
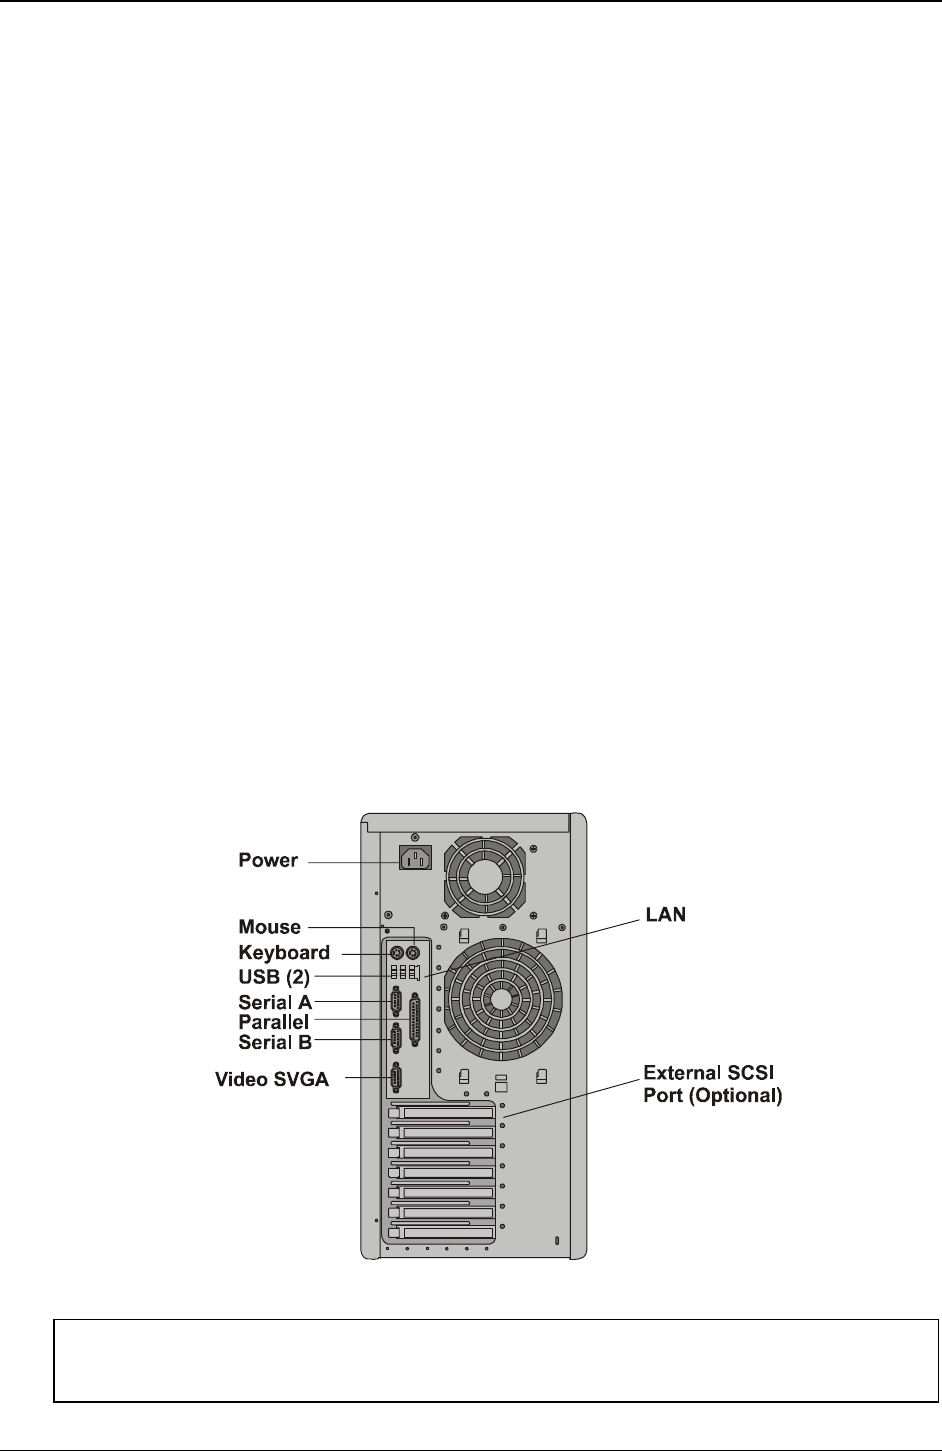
1. Connect the monitor, keyboard, and mouse to the HP Server tc3100 using the connections provided on
the rear of the chassis. See Figure 3-23.
The two USB connectors are reserved for peripherals other than the keyboard or mouse.
If you have a console switch box, refer to the switch box user guide for instructions on connecting the
keyboard, mouse, and monitor.
Figure 3-23. Rear Panel Ports
CAUTION The Keyboard and Mouse ports are both PS/2 ports, but are not interchangeable. If you
plug the keyboard into the Mouse port or the mouse into the Keyboard port, you will get
an error message and the system will not finish the boot process.


