Chapter 7 Replacing Parts
82
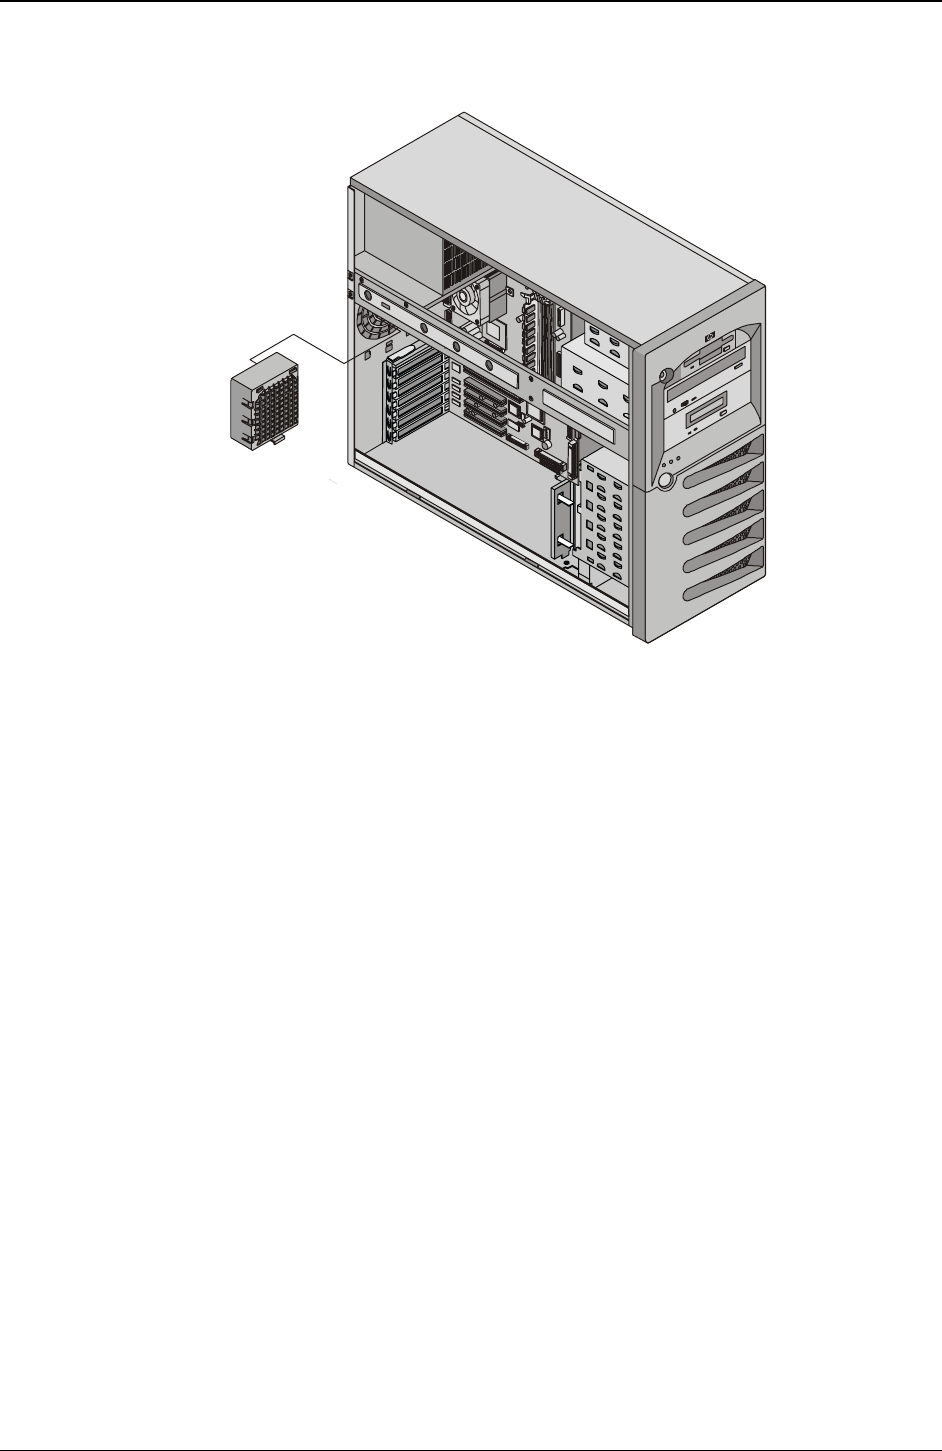
5. Squeeze the two blue tabs together and pull down slightly to release the latch from the rear panel slots.
6. Unplug the connector and lift out the fan. See Figure 7-1.
Figure 7-1. Removing the Chassis Fan
7. Remove the replacement chassis fan from the shipping container.
8. Connect the chassis fan connector.
9. Line up the tabs of the fan with the openings on the rear panel and snap the fan into place.
10. Replace any accessory boards removed to access the fan.
11. Close the side panel.
12. Replace the external cables and power cord.
13. Power up the server and return it to normal operation.
Power Supply
The low voltage ON/OFF switch on the front panel controls the power supply.
Use the following steps to replace the power supply:
1. If the server is operating, log off all users, back up files, and power down the server.
2. Disconnect the power cord and any external cables connected to the server. If necessary, label each one
to expedite re-assembly.
3. Open the side panel.
4. Disconnect the power supply connections to the FDD, CD-ROM and optional tape drive.
5. Unplug the power cable (BP1) from the system board.
6. Remove any long PCI cards.
7. Remove the screw in front of the PCI card guide and remove the guide.
8. Unplug the power to the cold swap back plane or from the hot swap power jumper cable.


