


120
Chapter 4 Working Inside Your System
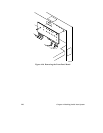
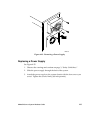
Replacing a Front Panel Fan
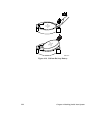
See Figures 4-21 and 4-22.
✏
Note
The front panel fans pull air from in front of the chassis so
that it flows across the boards and out the back. Thus, the
fans must be oriented for the correct airflow direction. If
you place the fan so the label faces the back of the chassis,
this should provide the correct orientation. You can
confirm this by checking the embossed arrows on the side
of the fan as you place it in its bracket:
⇒
Arrow points horizontally toward back of chassis
⇑
Arrow points vertically up
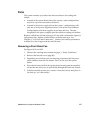
1. Place the plastic housing—flexible tabs facing up—on a flat surface.
2. With the power cable side of the fan facing down, place it inside the
plastic housing. Route the cable through the slot in the side of the
housing.
3. Press down on the fan until the inner flexible plastic tabs on the housing
snap into place on the fan. Make sure you do not pinch the cable
between the housing and the fan.
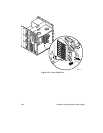
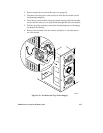
4. Position the plastic housing and fan assembly inside the chassis in front
of the card guide, and align the tabs with the slots in the front of the
chassis.
5. Insert the right flexible tab through the right slot in the front of the
chassis. Then press the left flexible tab through the left slot until it
snaps into place.
6. Connect the fan power cable connector to the fan header on the system
board. The bottom fan connects to connector Fan 2 and the top one
connects to connector Fan 4.
7. Replace the left side cover (page 81).
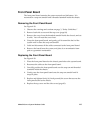
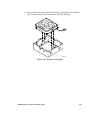
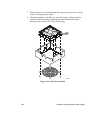
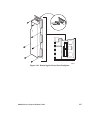
Removing the Fan Below the Top Power Supply
See Figures 4-23 and 4-24. The arrow on the fan indicates the direction of
airflow. The fan pulls air through the hot-docking bays and exhausts it out
of the system.
1. Observe the warnings and cautions on page 3, “Safety Guidelines.”