


CPF180i and CPF300i Page 17
2. INSTALLATION
NOTE
Throughout this Owner’s Manual same conventions are used. See the legend below:
[MENU]If you see brackets around a bold and capital letter word this refers to a key press.
[CHART] If you see brackets around a bold and small capital letter word this refers to a Soft Key
press.
GENERAL SETUP When a word(s) is bold capital letters and underlined, this refers to a menu
selection item.
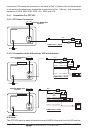
A GPS receiver and antenna are located inside the CPF180i and CPF300i and are designed
to be bracket mounted. Both models may be flush mounted, however an optional external
GPS antenna may be needed to receive satellite GPS signals.
To use the external GPS antenna, the internal GPS antenna must be turned off, using the
procedure below:
1. Turn the CPF180i or CPF300i ON and select the
GPS STATUS page.
2. Press [ENT] to show the
GPS SETUP menu.
3. Select
INTERNAL GPS and press [ENT].
4. Select
OFF and press [ENT].
5. Press [CLR] to exit the
GPS SETUP menu.
6. Confirm the
GPS STATUS page is showing satellite signal strength bars and receive
a fix.
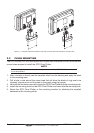
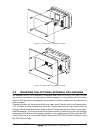
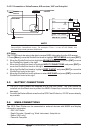
2.0 MOUNTING THE GPS CHART PLOTTER
The CPF180i and CPF300i are supplied with a swivel mounting bracket to allows them to
be dash mounted. For flush mounting, the optional GPS antenna must be used. Refer to the
images below for Bracket and Flush mounting.
NOTE
The CPF180i and CPF300i are designed to be bracket and flush mounted. However when bracket
mounting the CPF180i and CPF300i in an area where satellite reception is not possible with the
internal antenna or being flush mounted, the optional GPS antenna must be installed.
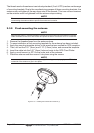
2.1 BRACKET MOUNTING
Before installing ensure the area the bracket is mounted to is strong enough to support the
weight of the GPS Chart Plotter especially while under way.
After the location is found, attach the mounting base to the area using the supplied
hardware.