


CPF180i and CPF300i Page 35
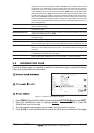
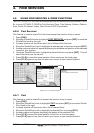
6. Next move the ShuttlePoint knob to highlight DAYLIGHT SAVING and press [ENT] or
move the ShuttlePoint knob to the right.
7. Daylight Saving menu has 3 options:
7.1
OFF Select Off when your location does not have Daylight Saving;
7.2
ON Select On to manually turn Daylight Saving On. This is the default
selection;
7.3
AUTO When selected the Daylight time offset is automatically changed.
8. Press [CLR] or move the ShuttlePoint knob to the left until the Chart page is shown.
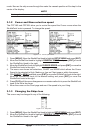
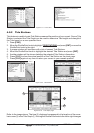
3.3 SELECTING LORAN TD OR OTHER COORDINATE SYSTEM
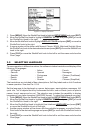
The GPS Fix coordinates can be changed to show Latitude/Longitude, Loran TD’s or UTM.
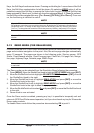
Below is the window that will appear when customizing the Coordinate System.
Figure 3.3 - Coordinate System menu
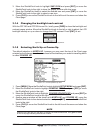
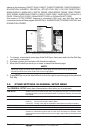
1. Press [MENU]. Move the ShuttlePoint knob to highlight SETUP MENU and press [ENT].
2. Move the ShuttlePoint knob to highlight
ADVANCED SETUP and press [ENT] or move
the ShuttlePoint knob to the right.
3. Move the ShuttlePoint knob to highlight
NAVIGATE and press [ENT] or move the
ShuttlePoint knob to the right.
4. Move the ShuttlePoint knob to highlight
COORDINATE SYSTEM and press [ENT] or
move the ShuttlePoint knob to the right.
5. Move the ShuttlePoint knob to highlight the desired coordinate type and press [ENT] or
move the ShuttlePoint knob to the right.
6. Press [CLR] or move the ShuttlePoint knob to the left until the Chart page is shown.
NOTE
If the TD is selected, you should set the Chain, Pair, ASF1, ASF2 and Alter. If the TD numbers are
not correct the Pair letters may be backwards. Reversing the two letters usually solves this issue.
Example Y/Z change to Z/Y.
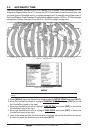
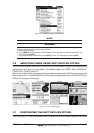
3.4 CHANGING THE CHART COLOR
The CPF180i and CPF300i have preprogrammed settings allowing you to customize the
look of the Chart page. The default is “Normal” however there are other settings; Normal,
Classic and Night. Night is very useful during evening hours so not to impair night vision.