


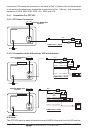


Page 18 CPF180i and CPF300i
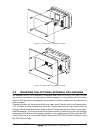
Figure 2.1 - Example of Bracket installation (CPF180i on the left side and CPF300i on the right side)
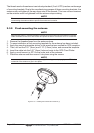
2.2 FLUSH MOUNTING
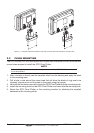
The CPF180i and CPF300i are supplied with a flush mount template for the cutout hole and
screw holes required to install the GPS Chart Plotter.
NOTE
Before drilling holes make sure there is enough room to mount the GPS Chart Plotter and there
are no obstructions.
1. After a location is found, peel the template label from the backing and apply the label
to the mounting area.
2. Drill a hole in one area of the cutout area that will allow the blade of a jig saw to be
inserted. Insert and cut out the area on the panel using the jig saw.
3. Next drill the four holes required to insert the GPS Chart Plotter with the mounting studs.
4. Install the mounting studs on the GPS Chart Plotter and insert into the mounting hole.
5. Attach the GPS Chart Plotter to the mounting location by attaching the supplied
hardware to the mounting studs.