


Page 28 CPF180i and CPF300i
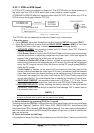
Keys, the Soft Keys functions are shown. Pressing and holding for 1 second one of the Soft
Keys, the Soft Keys customization list will be shown. By selecting
VIDEO option it will be
possible to assign the Soft Key to execute the Video Input function. Once the Soft Key has
been assigned to Video Input, its label will show the message [V
IDEO]. If [VIDEO] is pressed,
the Soft Keys will be assigned this way: [F
ULL SCREEN], [PIP VIEW], [AUTO SWITCH]. From now
on, the functioning is identical to case II.
NOTE
When the PIP video window is shown, the ShuttlePoint knob can be used to move the position of the
PIP window or move the cursor around the chart page. By default the PIP window is controlled by the
ShuttlePoint knob. To change so the chart cursor can be moved, press any Soft Key, then press
[VIDPAGE]. To change back to control the PIP window press any Soft Key, then press [VIDPAGE] again.
NOTE
When the PIP window is shown, the cursor and the vessels position may be shown under the PIP
window.
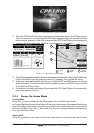
2.12 DEMO MODE (FOR DEALER USE)
In Demo mode the GPS Chart Plotter automatically places a Destination point on the Chart
page and simulates navigation to the point. Also, the active page changes automatically
every 10 seconds. The pages are shown in the following order: Start-up screen, GPS
Status, Chart/General window, Chart/Compass tape, Chart/Fish, Full page Fish, Naviga-
tion page, Highway Page, Celestial page, NMEA Page.
NOTE
This mode is use by selling dealers to promote the features of the CPF180i or CPF300i when on
a retail shelf.
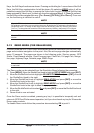
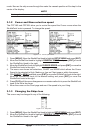
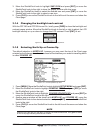
The Demo mode can be selected from the Simulation Menu following the procedure:
1. Press [MENU]. Move the ShuttlePoint knob to highlight
SETUP MENU and press [ENT].
2. Move the ShuttlePoint knob to highlight
ADVANCED SETUP and press [ENT] or move
the ShuttlePoint knob to the right.
3. Move the ShuttlePoint knob to highlight
SIMULATION and press [ENT] or move the
ShuttlePoint knob to the right.
4. Move the ShuttlePoint knob to highlight
DEMO MODE and press [ENT] or move the
ShuttlePoint knob to the right to show the popup window.
5. Move the ShuttlePoint knob to select
On and press [ENT] or move the ShuttlePoint knob
to the right.
6. Demo mode is now activated.
Once the Demo mode is enabled, pressing any key it is possible to temporally exit and
returns to GPS Chart Plotter normal operation, but if you do not touch any key for 30 seconds
Demo mode re-starts.
To disable Demo mode follow the procedure above selecting
Off at point 5.