


7. INITIAL SETTINGS
7-27
7.7 Sensor Setup
The [Sensor Selection] menu sets up the sensor equipment connected to the NAVpi-
lot. To open the [Sensor Selection] menu, select [Sensor Selection] from the [Installa-
tion Menu] window.
Before doing this procedure, turn on all CAN bus equipment connected to the CAN
bus network of the NAVpilot.
Sensor sync
1. The cursor is selecting the current setting for [Sensor Sync]; push the Course
control knob.
2. Rotate the Course control knob to select [ON] or [OFF] then push the knob.
When [Sensor Sync] is set to [ON], the sensors connected to NavNet3 or NavNet
TZtouch devices are available for NAVpilot.
Sensor setup
The procedure which follows shows how to set up a heading sensor.
1. Turn on all sensors connected to NAVpilot.
2. Rotate the Course control knob to select [Heading Sensor] then push the knob.
When [Auto Detect] is selected to [Yes], all heading sensors connected to the
NAVpilot are shown. In case of multiple heading sensors, the sensors are priori-
tized in the order of FURUNO CAN bus heading sensor, other CAN bus heading
sensor, NMEA0183 heading sensor. If desired you can change the order as fol-
lows:
1) Rotate the Course control knob to select the number then push the knob.
2) Rotate the Course control knob to select a sensor then push the knob.
[Auto Detect] automatically re-orders sensors in the above-mentioned order.
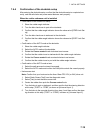
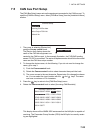
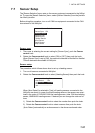
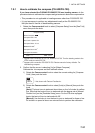
Sensor Selection
Sensor Sync: ON
Heading Sensor
Speed (STW)
Speed (SOG)
Position Sensor
Wind Sensor
Depth Sensor
Temp Sensor
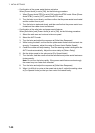
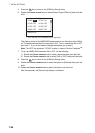
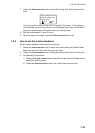
Heading Sensor
Auto Detect : No
1st: PG-700 : 0019E4
2nd: - - - - - - - - - - - - - -
3nd: - - - - - - - - - - - - - -