Chapter 6 Managing the File System
Working With Disks
StorNext User’s Guide 109
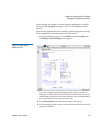
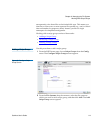
2 Do one of the following:
• Select a file system from the Unmounted File Systems list and
click Mount. The Mount File System Status screen appears.
• Select a file system from the Mounted File Systems list and click
Unmount. The Unmount File System Status screen appears.
3 After the status screen informs you that the task has successfully
completed, click Close.
Working With Disks
A disk:
• can be used as an individual element or as one of many disks in a
Redundant Array of Inexpensive Disks (RAID).
• can contain metadata information, journaling, and/or data.
• can constitute a single stripe group itself, or can be one node of a
multi-disk stripe group.
• can be a local hard disk located inside a server (if only a metadata
disk), or most commonly, used in a RAID visible to all machines in
the Storage Area Network (SAN) over FC.
The procedures in this section describe how to manage disks by adding,
deleting, and defragmenting disks. Each disk is assigned to a disk type
that specifies the number of sectors on the disk.
• Adding Disks
• Deleting Disks
• Defragmenting a Disk
Adding Disks 6
Use this procedure to add a disk to a selected file system.
Note: A disk must have a label before you can add it. For
information about labeling a disk, see Labeling a Device
on
page 98.


