


4-8 CHAPTER 4: NETWORK CONFIGURATION TASKS
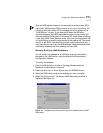
LECS Database
Creation and
Synchronization
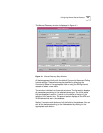
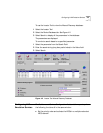
The second section is used to build the LECS database. This section allows
you to enter LAN Emulation Servers (LES) and their corresponding backup
LAN Emulation Servers into the LECS database. Initially, the LECS
database window shows the default LECS database displaying only a
subset of the LAN Emulation Servers that exist in the network.
The default LECS database (the subset) is taken from one of the LECS that
was discovered and shown in the first part of the form.
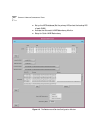
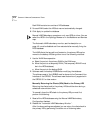
To build/modify the LECS database:
1 Select the admin and default elan ID from the toggle buttons on the side
of each entry.
2 Populate the database with all the ELAN IDs (LESs) and their
corresponding backup LESs using the selection buttons.
In order not to setup a backup for a LES, select the backup LES address to
be the same as the primary LES address.
3 Click Add to add the entry to the database or click Delete to delete
unwanted entries from the LECS database.
4 Click Apply
The LECS database shown in the window is applied to all the active and
enabled LECSs in the network. After this step LECSs are all said to be
synchronized
.
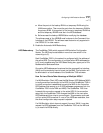
Enabling Automatic
LANE Redundancy
The third section allows you to set up the Automatic LANE redundancy
procedure. There are three possibilities for Automatic LANE redundancy.
■ Disabled - instructs the NMS not to automatically activate the backup
LES and a failure report is not issued.
■ Report Only - The NMS issues a failure report but does not
automatically activate the backup LES.
■ Report and Activate - The NMS issues a failure report and
automatically activates the backup LES.
Quick LANE
Redundancy Mode
The Quick LANE Redundancy mode button (which is selected by default),
allows for a quick LES/BUS failover to backup the LES/BUS, when the
primary LES/BUS fails. When this button is selected, the LANE redundancy
monitoring software performs some vital checks to determine if the