


22
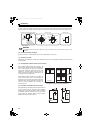
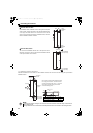
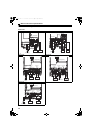
Protruding the heatsink
(2) Moving and removing the back installation frames
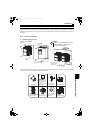
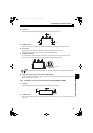
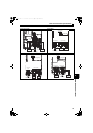
(3) Installing the converter to the enclosure
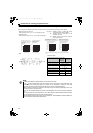
Protrude the heatsink of the converter from the installation enclosure, and secure the converter using the top and bottom
installation frames.
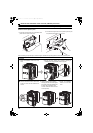
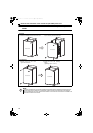
FR-HC2-H160K to H280K
One installation frame is attached to each of the upper and lower parts
of the converter. Change the position of the rear side installation frame
on the upper and lower sides of the converter to the front side as
shown on the right. When changing the installation frames, make sure
that the installation orientation is correct.
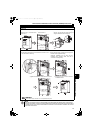
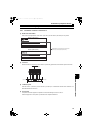
FR-HC2-H400K, H560K
The converter has installation frames: two on the top and the two on
the bottom. As shown on the right, remove the back installation frames
on the top and bottom of the converter.
NOTE
• Protruding area contains a cooling fan, so it cannot be used in the environment where water drops, oil mist, dust and
other substances exist.
• Foreign substances such as screws and dust must be prevented to enter in the converter or the cooling fan section.
Shift
Shift
Upper
installation
frame
Lower
installation
frame
Upper installation
frame (rear side)
Lower installation
frame (rear side)
Removal
Removal
Converter
Inside the
enclosure
Enclosure
Exhausted air
Installation
frame
Dimension of
the outside of
the enclosure
Cooling
wind
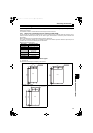
D1
∗
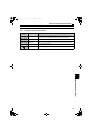
Converter model D1
FR-HC2-H160K, H220K 185
FR-HC2-H280K to H560K 184
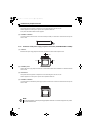
The enclosure enclosing FR-HC2-H160K and higher
has a finger guard on its back. The thickness of the
enclosure should be less than 10mm (), and do not
place anything around the finger guard to avoid
contact with the finger guard.
Enclosure
Finger guard
10∗
140
6
HC2.book 22 ページ 2012年11月19日 月曜日 午前10時52分