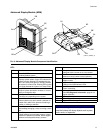
Appendix A - Advanced Display Module (ADM)
3A2098H 105
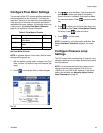
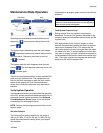
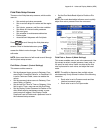
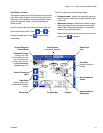
Fluid Plate Setup Screens
There are nine fluid plate setup screens, which enable
users to:
• Set controls and valve commands
• Set on and off delays for valves and the regula-
tor
• Set k-factor, pressure, and flow rate variables
• Set offsets for inlet and outlet pressures
• Set error types
• Set variables for maintenance advisories
• Define styles
• Associate swirl dispenser with fluid plate
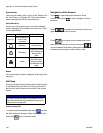
Press to scroll through the fluid plate setup
screens. Once in the desired screen, press to
access the fields to make changes. Press to exit
edit mode.
NOTE: Users must be out of edit mode to scroll through
the fluid plate setup screens.
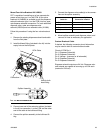
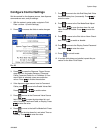
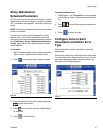
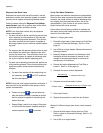
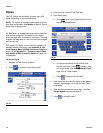
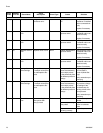
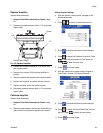
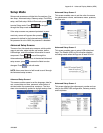
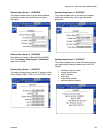
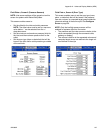
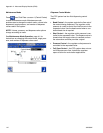
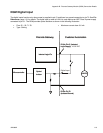
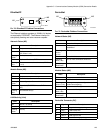
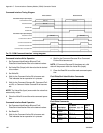
Fluid Plate x, Screen 1 (Control Settings)
This screen enables users to:
• Set the dispense trigger source to Gateway, Com-
mand Cable, Command Cable 3x, or Combined. If it
is set to Command Cable, users can enable the
valves.
• Set the command value source to Gateway, Com-
mand Cable, or Display.
• Set the Job End Timer to Timer or Gateway. If this
field is set to Timer, users can set Job End Delay.
• Set the Display Control Password to Enable or Dis-
able. When entering maintenance mode, a pass-
word prompt will appear if the Display Control
Password is set to Enable and a password is set in
the Advanced setup screens.
• Set the Run Mode Bead Adjust to Enable or Dis-
able.
NOTE: Run mode bead adjust allows a user to quickly
adjust flow rate or pressure from the run screen.
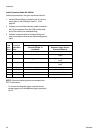
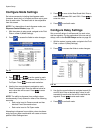
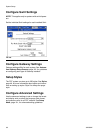
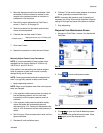
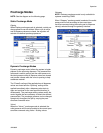
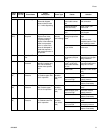
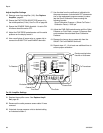
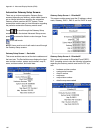
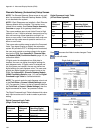
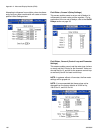
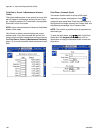
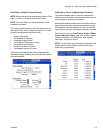
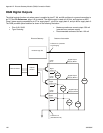
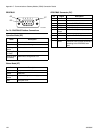
Fluid Plate x, Screen 2 (Mode Settings)
This screen enables users to set valve commands. Use
this screen to select a mode (pressure, bead, shot, or
full open) for each valve. Users can also set the flow
rate or pressure for each valve, and adjust the bead
scale.
NOTE: The ability to dispense from multiple valves
simultaneously is only allowed in either of the following
scenarios.
• Each valve is set to Pressure mode and has
identical command values.
• Each valve is set to Full Open mode.