


System Setup
3A2098H 33
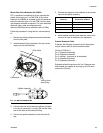
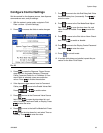
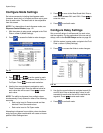
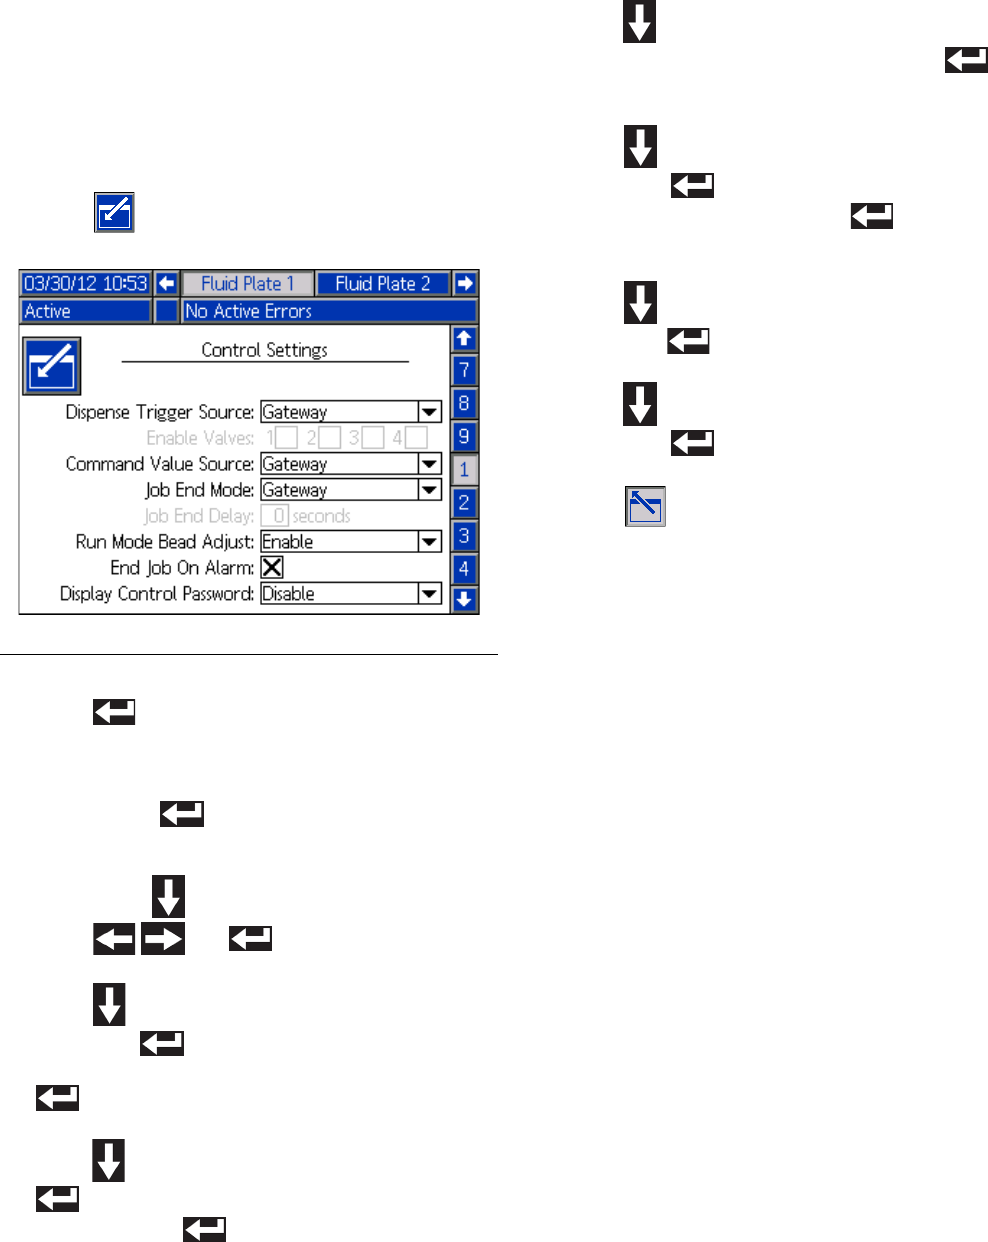
Configure Control Settings
Set the controls for the dispense source, how dispense
commands are sent, and job settings.
1. With the system in setup mode, navigate to Fluid
Plate x, screen 1 (Control Settings).
2. Press to access the fields to make changes.
3. Press to open the Dispense Trigger Source
drop-down list, and select Gateway, Command
Cable, Command Cable 3x, or Combined. If Com-
mand Cable is selected, users can enable the
valves. Press to finalize the selection.
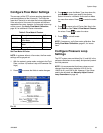
4. If the dispense trigger source is set to Command
Cable, press to move to the Enable Valves field.
Press and to enable valves.
5. Press to move to the Command Value Source
field. Press to open the drop-down list, and
select Gateway, Command Cable, or Display. Press
to enter the value.
6. Press to move to the Job End Mode field. Press
to open the drop-down list, and select Timer or
Gateway. Press to enter the value.
7. Press to move to the Job End Delay field. Enter
the desired delay time (in seconds). Press to
enter the value.
8. Press to move to the Run Mode Bead Adjust
field. Press to open the drop-down list, and
select Enable or Disable. Press to enter the
value.
9. Press to move to the End Job on Alarm Check-
box. Press to enable or disable.
10. Press to move to the Display Control Password
field. Press to enter the value.
11. Press to exit edit mode.
12.
If multiple fluid plates are installed,
repeat this pro-
cedure for the other Fluid Plates.
F
IG
. 20