97
Start and stop using terminals (External
operation)
4
DRIVING THE MOTOR
4.5.4 Changing the frequency (60Hz, initial value) at the maximum voltage input
(5V, initial value)
<How to change the maximum frequency>
REMARKS
Pr. 178 STF terminal function selection must be set to "60" (or Pr. 179 STR terminal function selection must be set to "61").
(all are initial values)
The motor will not rotate ... Why?
Check that [EXT] is lit.
[EXT] is valid when Pr. 79 = "0" (initial value) or "2".
Use to lit [EXT].
Check that wiring is correct. Check once again.
Change the frequency (0Hz) at the minimum voltage input (at 0V, initial value)
Adjust the frequency in calibration parameter C2 Terminal 2 frequency setting bias frequency. (Refer to
Chapter 4 of the Instruction Manual (Applied).)
When you want to compensate frequency setting, use terminal 1.
For details, refer to Chapter 4 of the Instruction Manual (Applied).
Changing example When you want to use the 0 to 5VDC input frequency setting potentiometer to change the
frequency at 5V from 60Hz (initial value) to 50Hz
Adjust to output 50Hz at 5V voltage input.
Set "50Hz" in Pr. 125.
The frequency meter (indicator) connected across terminals FM and SD does not indicate exactly 50Hz ... Why?
The meter can be adjusted by calibration parameter C0 FM terminal calibration. (Refer to Chapter 4 of
the Instruction Manual (Applied).)
Set frequency at 0V using calibration
parameter C2 and adjust the indicator using
calibration parameter C0.
(Refer to Chapter 4 of the Instruction
Manual (Applied). )
REMARKS
As other adjustment methods of frequency setting voltage gain, there are methods to adjust with a voltage applied to across
terminals 2 and 5 and adjust at any point without a voltage applied.
(Refer to Chapter 4 of the Instruction Manual (Applied) for the setting method of calibration parameter C4.)
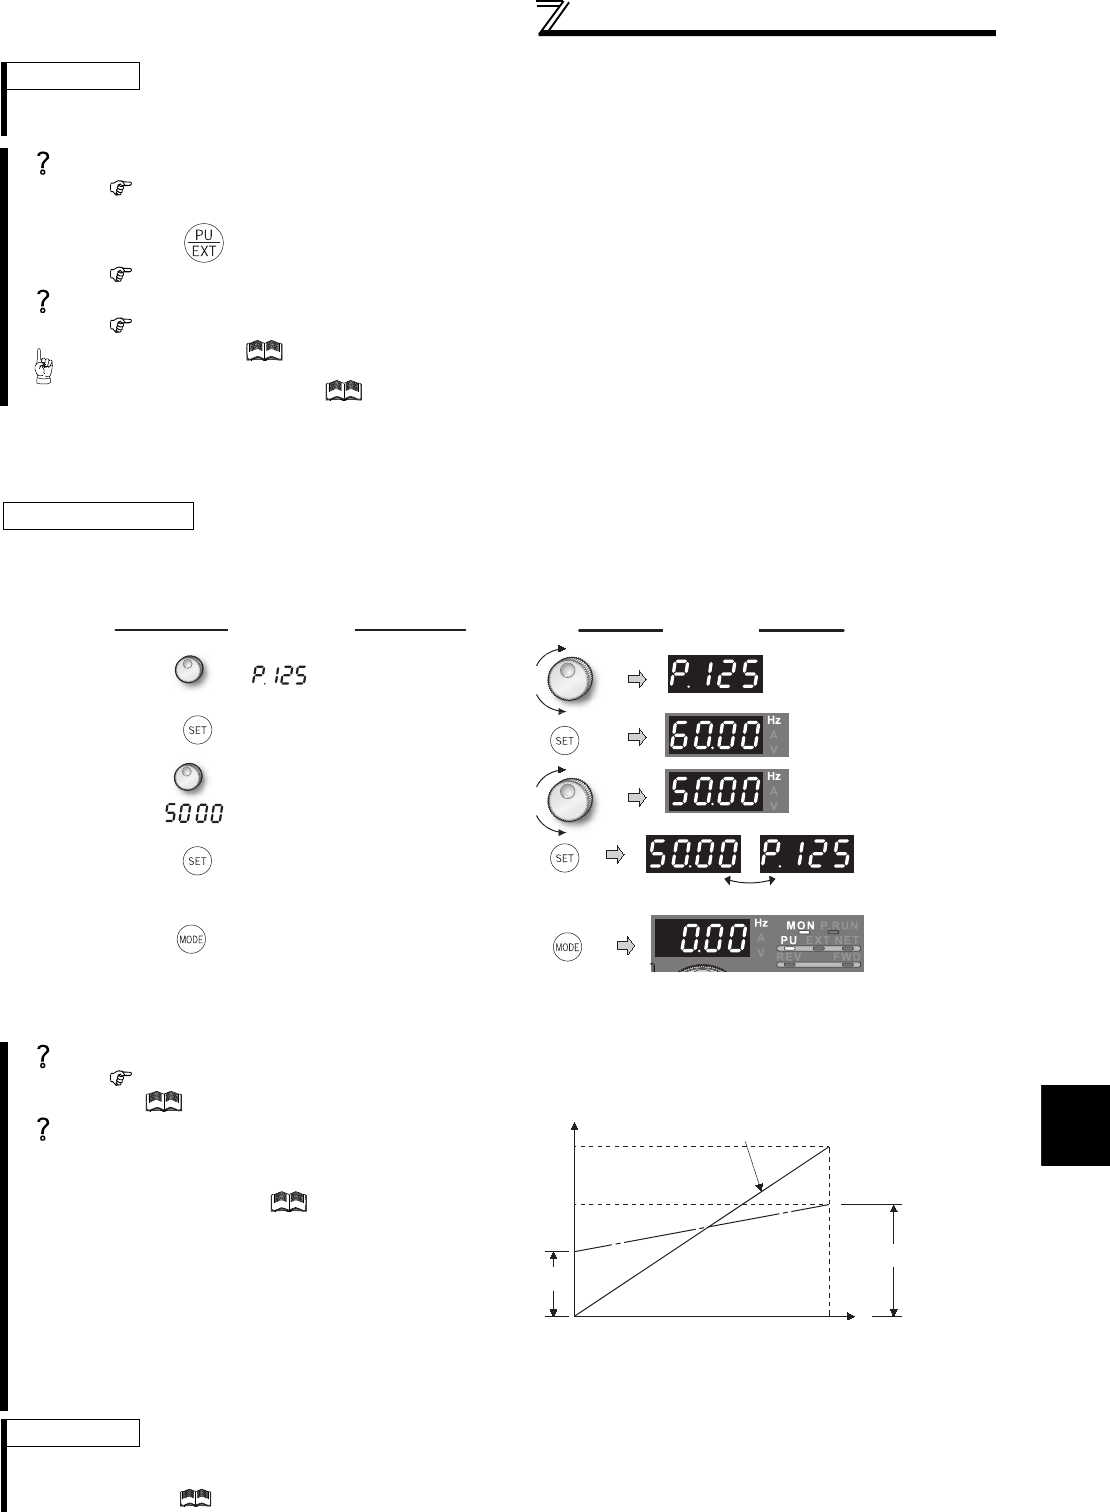
4.Press to set.
6.
Turn the start switch (STF or STR) on and turn the potentiometer
(frequency setting potentiometer) clockwise to full slowly.
1.Turn until (Pr. 125) appears.
5.Mode/monitor check
Press twice to choose the monitor/frequency monitor
.
DisplayOperation
2.
Press to show the present set value. (60.00Hz)
Flicker
··· 50Hz output at 5V input complete!!
3.Turn to change the set value
to " ". (50.00Hz).
.
(Refer to 4.5.3 steps 2 to 5)
Output frequency
(Hz)
0
0
Frequency setting signal
100%
10V
Initial value
Bias
05V
C2
(Pr. 902)
C3 (Pr. 902) C4 (Pr. 903)
Pr.125
Gain
60Hz


