6-32 ENGINE TOP END
Cylinder, Pistons
•
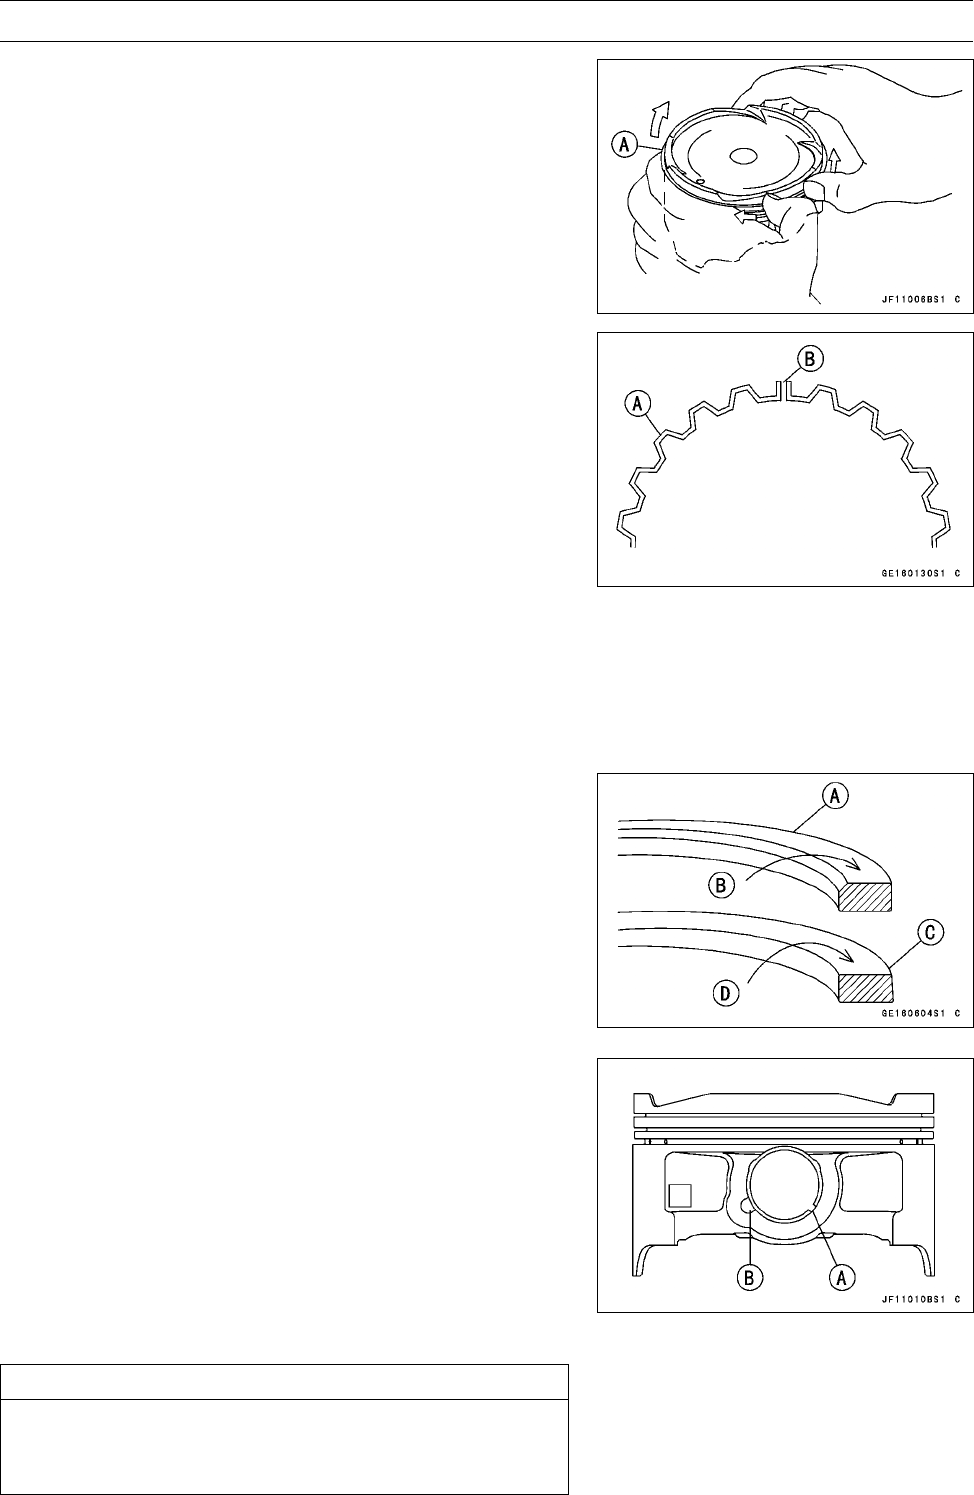
Carefully spread the ring opening with your thumbs and
then push up on the opposite side of the ring [A] to remove
it.
•
Remove the 3-piece oil ring with your thumbs in the same
manner.
Piston/Cylinder Installation
NOTE
○
If a new cylinder is used, use new piston rings.
○
If new pistons and/or a new cylinder are installed, apply
thin coat of molybdenum disulfide oil solution to the new
pistons and cylinder bores.
•
Install the oil ring expander [A] in the bottom piston ring
groove so the ends [B] butt together.
•
Install the oil ring steel rails, one above the expander and
one below it.
○
Spread the rail with your thumbs, but only enough to fit
the rail over the piston.
○
Release the rail into the bottom piston ring groove.
NOTE
○
The oil ring rails have no “top” or “bottom”.
•
Do not mix up the top and second ring.
•
Install the top ring [A] so that the "R" mark [B] faces up.
○
Install the second ring [C] so that the "RN" mark [D] faces
up.
○
Apply molybdenum disulfide oil solution to the piston
rings.
NOTE
○
If a new piston is used, use new piston ring.
•
Install the piston with its marking hollow facing exhaust
side.
•
Fit a new piston pin snap ring into the side of the piston
so that the ring opening [A] does not coincide with the slit
[B] of the piston pin hole.
○
Apply molybdenum disulfide oil solution to the piston pins
and piston journals.
○
When installing the piston pin snap ring, compress it only
enough to install it and no more.
CAUTION
Do not reuse snap rings, as removal weakens and
deforms them.
They could fall out and score the cylinder wall.


