8-26 ENGINE BOTTOM END
Crankshaft and Connecting Rods
Crankshaft Side Clearance
•
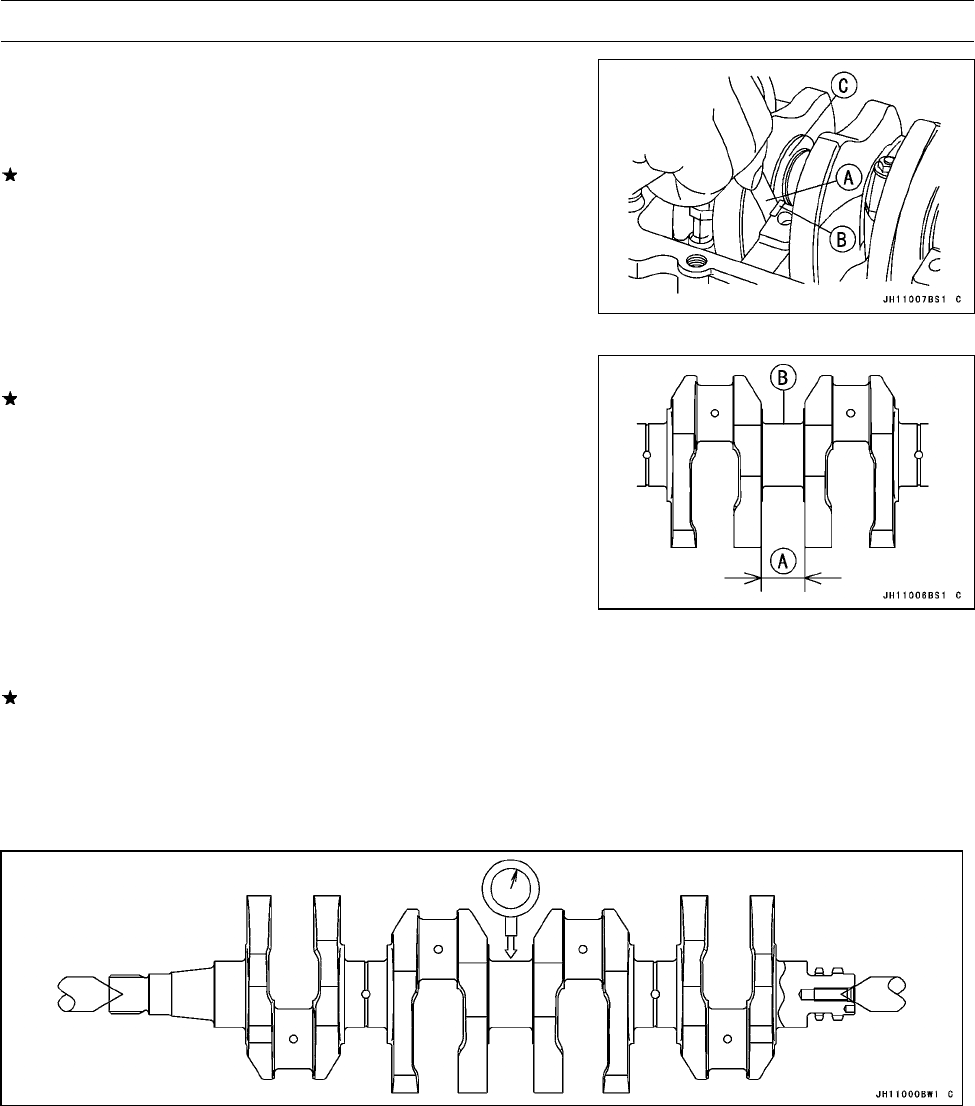
Insert a thickness gauge [A] between the thrust washer
[B] and the c rank web [C] at the No. 3 main journal to
determine clearance.
If the clearance exceeds the service limit, replace the
thrust washer as a set and check the width of the crank-
shaft #3 main journal.
Crankshaft Side Clearance
Standard: 0.05 ∼ 0.24 mm (0.0020 ∼ 0.0094 in.)
Service Limit: 0.44 mm (0.017 in.)
•
Measure the crankshaft # 3 main journal width [A].
If the measurement exceeds the standard, replace the
crankshaft [B].
Crankshaft #3 Main Journal Width
Standard: 27.45 ∼ 27.55 mm (1.0807 ∼ 1.0846 in.)
Crankshaft Runout
•
Measure the crankshaft runout.
If the measurement exceeds the service limit, replace the
crankshaft.
Crankshaft Runout
Standard: TIR 0.03 mm (0.0012 in.) or less
Service Limit: TIR 0.07 mm (0.0028 in.)


