12-20 S TEERING
Reverse System
Reverse Bucket Removal/Installation
•
Disconnect the ball joint at rear end of the shift cable.
•
Remove the pump cover.
•
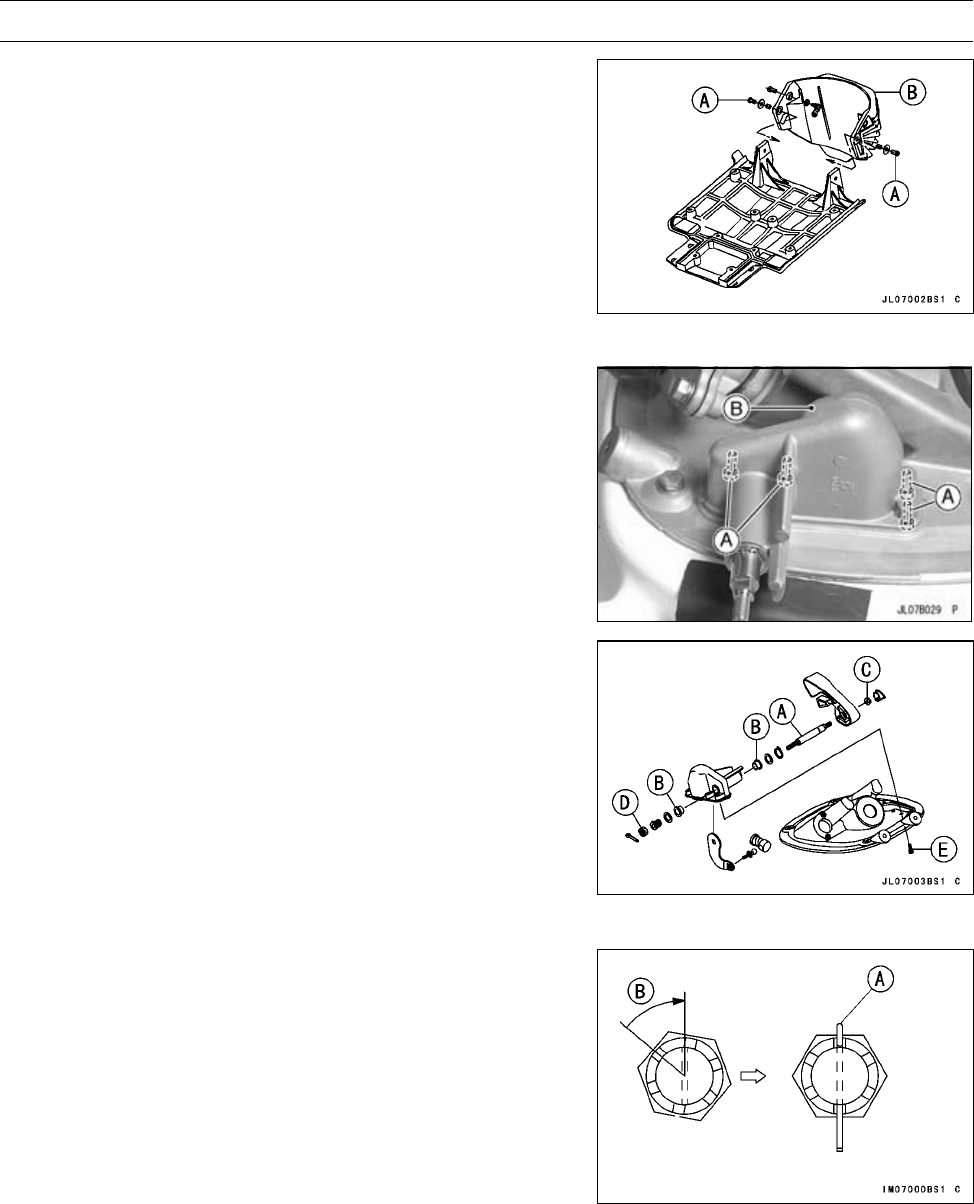
Unscrew the pivot bolts [A] and remove the reverse
bucket [B].
•
Installation is the reverse of removal. Note the following.
○
Apply a non-permanent locking agent to the reverse
bucket pivot bolts, and torque them.
Torque - Reverse Bucket Pivot Bolts: 19 N·m (1.9 kgf·m, 14
ft·lb)
○
After installation, check the shift cable adjustment.
Shift Lever Shaft Removal/Installation
•
Remove:
Steering Cover (see Steering Removal)
Steering Cable Ball Joint at Upper End (disconnect)
•
Unscrew the mounting bolts [A] on the inside of the hull
and remove the shift lever holder [B].
•
Assemble the shift lever holder, noting the following.
•
Grease:
Shift Lever Shaft [A]
Bushings [B]
•
Apply silicone sealant to the mating surface between the
shift lever holder bottom and steering holder upper sur-
face.
•
Apply a non-permanent locking agent to the lever nut [C]
and the shift lever holder mounting bolts [E].
•
Torque the shift lever locknut [D].
Torque - Shift Lever Locknut: 20 N·m (2.0 kgf·m, 14.5 ft·lb)
•
Replace the cotter pin [A] with a new one.
NOTE
○
When inserting the cotter pin, if the slots in the locknut
do not align with the cotter pin hole in the steering shaft,
tighten the locknut clockwise [B] up to next alignment.
○
It should be within 30 degree.
○
Loosen once and tighten again when the slot goes past
the nearest hole.
•
Bend the cotter pin over the nut.
•
Before connecting the shift and steering cables, apply a
water resistant grease to their joint balls.


