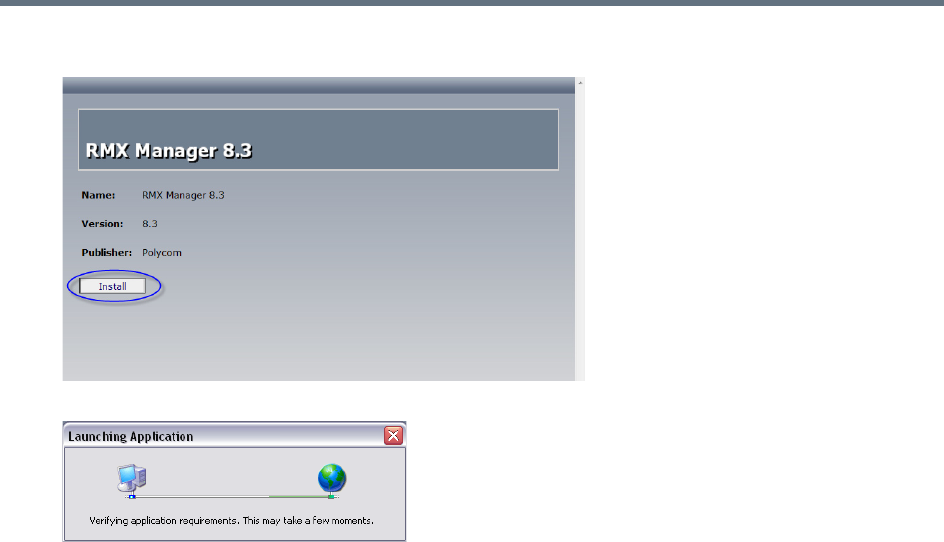
RMX Manager Application
Polycom®, Inc. 653
2 Click Install.
The installer verifies the application’s requirements on the workstation.
3 Continue the Installation as described in Installing the RMX Manager on Your Workstation.
Downloading the Installation files from Polycom Support Site
1 Access the Polycom web site at http://www.polycom.com/support.
2 Click on Documents and Downloads and then select UC Infrastructure from the drop-down list
3 Select the appropriate RMX/Collaboration Server product.
4 Click the RMX 1500/1800/2000/4000 version n.n.n.n Local Web Client (RMX Manager) link.
The file download dialog box opens.
5 Follow the standard download procedure to either run the installer directly by selecting Open or
Save in the File Download dialog.
If you select Open, the download is performed and the archive containing the RMX Manager and
its components are saved in Internet Explorer’s Temporary Internet Files folder.
a Navigate to the RMX_x-x-x-nnnn_LocalWebClient-RMXManager >
RmxManagerInstallerMsi folder.
b Double-click setup.exe to install the RMX Manager.
If you select Save, you need to specify where the archive containing the RMX Manager and its
components are saved locally.
a When the download completes, select Open or Open Folder.
b Navigate to the RMX_x-x-x-x_LocalWebClient-RMXManager folder.
c Double-click deploy.application to install the RMX Manager.
6 Continue the Installation as described in Installing the RMX Manager on Your Workstation.
