


Schematic Capture - Basics
4-26 Electronics Workbench
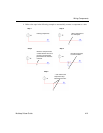
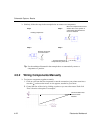
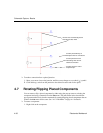
4.5.5 Placing Wires Directly Onto Workspace
For more flexibility during wiring, you can also start and end a wire in “mid-air”, that is,
without attaching it to a component or starting from a previously placed junction.
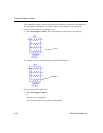
To place a wire using the menu:
1. Select
Place/Wire.
Or
Right-click on the workspace and select
Place Schematic/Wire from the pop-up menu that
appears.
2. Click to place a junction on the workspace and then move the mouse to route the wire as
desired.
3. Click as desired to lock the wire to a specific point on the workspace.
4. Double-click to place a junction in “mid-air” and end the wire placement.
Or
Click to attach the wire to an existing wire or component pin.
Note You can also double-click to auto-insert a junction on the workspace and start wiring
as described above.
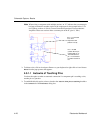
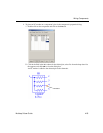
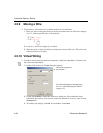
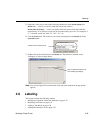
4.5.6 Setting Wiring Preferences
You can set your preferences for how Multicap controls the automatic wiring.
To set your wiring preferences:
1. Choose
Options/Global Preferences and select the General tab.
2. In the
Autowire box, enable any or all of the following options:
•
Autowire when pins are touching — makes an automatic connection if a component pin
is touching a wire, another pin or a junction.
•
Autowire on connection — chooses the most efficient path to wire the selected
components together. Disabling this option gives you more control over the wire path,
as Multicap follows the exact path of your cursor.
•
Autowire on move — when you move a wired component, Multicap reshapes the wire
to the most efficient path. Disabling this option means that the wires will move exactly
in the shape and direction that you move a wired component.
•
Delete associated wires when deleting — wires attached to a component will be deleted
when that component is deleted.
3. Click
OK.