


Schematic Capture - Advanced Functions
5-14 Electronics Workbench
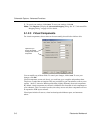
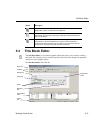
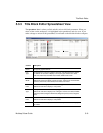
The
Title Block Editor consists of:
• the
menu bar, which contains the menus with their associated commands.
• the
toolbars, which give quick access to the most commonly-used tools.
• the
workspace, which is where you build or modify your title blocks. The Draw Grid aids
in the placement of graphic elements inside the
Boundary Box.
• the
Spreadsheet View, which is where you find and edit various title block parameters.
• the
status line, which gives information on the currently selected object or action.
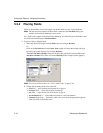
To edit a title block that is already in your circuit:
1. Right click on the desired title block and select
Edit Title Block from the pop-up. The Title
Block Editor
appears with the selected title block loaded.
Note “In-Place Edit Mode” displays at the bottom of the dialog box when the
Title Block
Editor
is launched using the method described above. Changes will apply to the
selected title block only.
2. Edit the title block as described in:
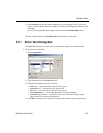
•“5.3.1 Enter Text Dialog Box” on page 5-15
•“5.3.2 Placing Fields” on page 5-16.
•“5.3.3 Title Block Editor Spreadsheet View” on page 5-19
•“5.3.4 Title Block Editor Menus” on page 5-20
•“5.3.5 Toolbars” on page 5-27
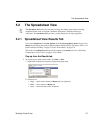
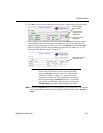
3. Select
File/Exit. The following dialog box appears:
4. Click
Ye s. The Title Block Editor closes and you are returned to the main Multicap
workspace. The changes are reflected in the title block.
To edit a title block that is stored in the
Title Block folder, or create a new title block:
1. Select
Tools/Title Block Editor. The Title Block Editor appears with a new un-named title
block.
2. If you wish to create a new title block, you may start working from here.
Or
If you wish to edit an existing title block, select
File/Open, navigate to the Titleblocks
folder, select the desired title block and click
Open.
3. Edit the title block using the menus and toolbars as described in the following sections.