


190-00728-04 Rev. A
Embraer Prodigy
®
Flight Deck 100 Pilot’s Guide
644
APPENDIX B
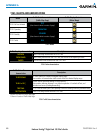
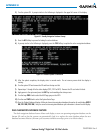
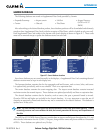
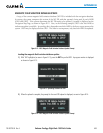
6) As instructed on the display, press any key to continue. The display will now appear as shown in Figure B-5.
Figure B-5 Navigation Database Verification Prompt
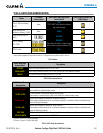
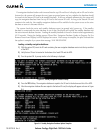
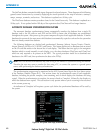
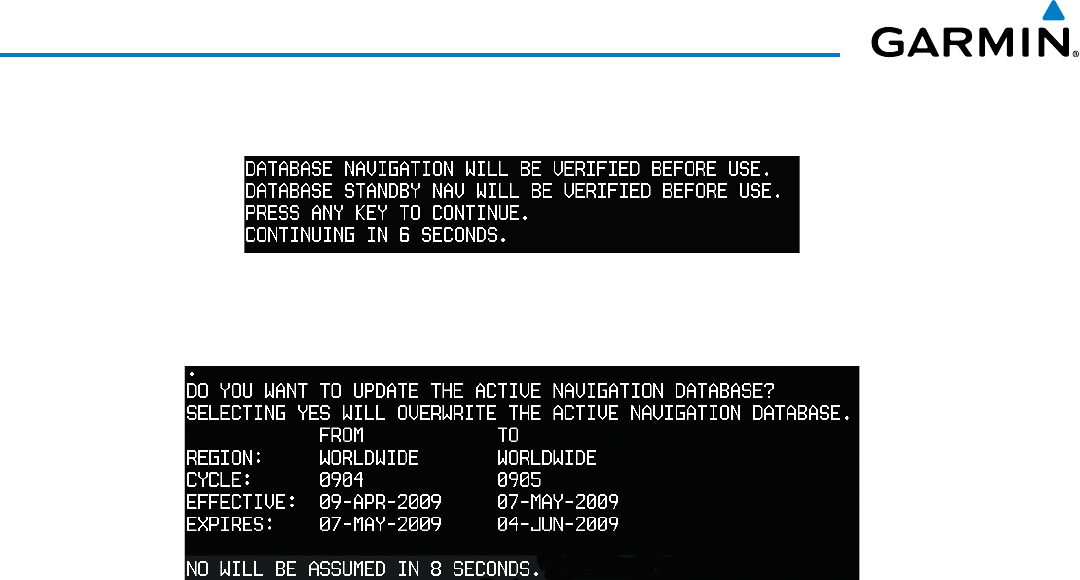
7) Press any key to continue. The display will now appear as shown in Figure B-6.
Figure B-6 Active Navigation Database Prompt
8) Press the NO Softkey. The display now starts in normal mode. Since the database effective date is not yet valid,
it should not be loaded as the active database. The display now starts in normal mode. Do not remove power
while the display is starting.
9) Press the ENT Key to acknowledge the startup screen.
10) Turn the large FMS Knob to select the AUX Page group on the MFD.
11) Turn the small FMS Knob to select the System Status Page.
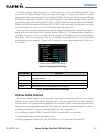
12) The new database is copied to the SD card in the bottom card slot of each PFD. Progress can be monitored in
the SYNC STATUS field. When copying is finished, ‘Complete’ is displayed.
13) Turn system power OFF.
14) Remove the SD card from the top card slot of the MFD.
15) Turn system power ON.
16) Press the ENT Key to acknowledge the startup screen.
17) Turn the large FMS Knob to select the AUX Page group on the MFD.
18) Turn the small FMS Knob to select the System Status Page.
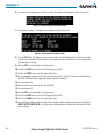
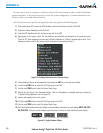
19) Press the Display Database Selection Softkey to show standby navigation database information for each display
(MFD1 DB, PFD1 DB, PFD2 DB). Verify the correct standby navigation database cycle information is shown
for each display.