


190-00728-04 Rev. A
Embraer Prodigy
®
Flight Deck 100 Pilot’s Guide
648
APPENDIX B
In some cases it may be necessary to obtain an unlock code from Garmin in order to make the database
product functional. It may also be necessary to have the system configured by a Garmin authorized service
facility in order to use some database features.
After the data has been copied to the appropriate data card, perform the following steps:
1) With system power OFF, remove the MFD database card from the bottom card slot of the MFD.
2) Update the Garmin databases on the MFD card.
3) Insert the MFD database card into the bottom card slot of the MFD.
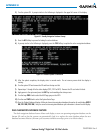
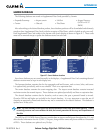
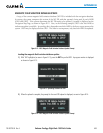
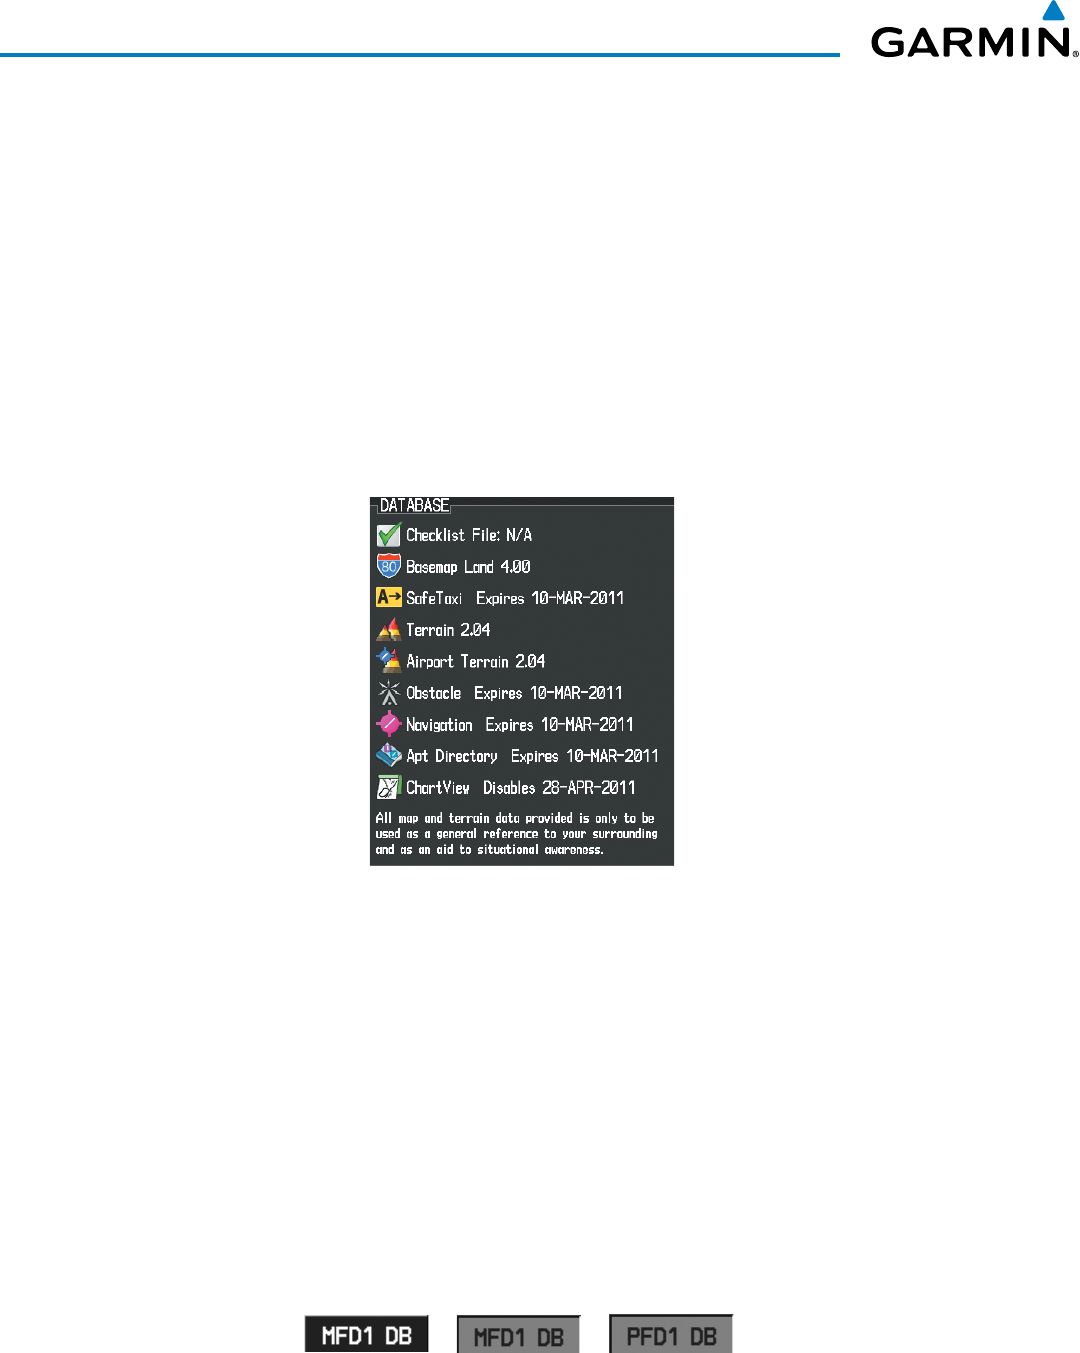
4) Apply power to the system, check that the databases are initialized and displayed on the power-up screen
(Figure B-10). When updating the terrain and FliteCharts databases, a ‘Verifying’ message may be seen. If this
message is present, wait for the system to finish loading before proceeding to step 5.
Figure B-10 Database Information on the Power-up Screen
5) Acknowledge the Power-up Page agreement by pressing the ENT Key or the right most softkey.
6) Turn the large FMS Knob to select the AUX Page group on the MFD.
7) Turn the small FMS Knob to select the System Status Page.
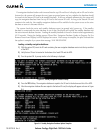
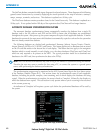
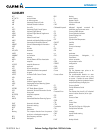
8) Monitor the Sync Status in the Database Window. Wait for all databases to complete synching, indicated by
‘Complete’ being displayed as seen in Figure B-9.
9) Remove and reapply power to the system.
10) Turn the large FMS Knob to select the AUX Page group on the MFD.
11) Turn the small FMS Knob to select the System Status Page.
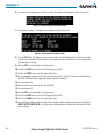
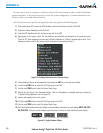
12) Press the Display Database Selection Softkey to show database information for each display (MFD1 DB, PFD1
DB, PFD2 DB). Verify the correct database cycle information is shown for each database for each display.
Figure B-11 Display Database Softkey
Unselected MFD1 DB Selected PFD1 DB Selected